Showing posts with label Sewing. Show all posts

Friday, February 21, 2014

Little Gentleman Cardigan

Sometimes it feels like every sewing project out there for babies revolves around girls. It is super easy to find a quick skirt, dress, headband, pair of leggings (I could go on) tutorial for your little girl. There are thousands. But when it comes to baby boys, it is like a deer in the headlights.
 
And then one day, the heavens opened up, and I found this.
 Cutest thing EVER!
 
Naturally I had to make one immediately. I rummaged through what I already had for the baby and got to work. So essentially this project could be considered free if you already have the stuff. If not, it is still really inexpensive.
 
I think this last one is my favorite. The combination of nautical and a teeny tiny onesie make it irresistible! Now I just need this little man to come so we can play dress up.

Sunday, February 16, 2014

Quick & Easy Burp Cloth

I think you hit a certain point in your life when you look at your Facebook feed and at least 20 of yours friends are expecting. And it will stay that way for years and years to come! If you are like me, then you are probably always looking for a little something extra to add to all those baby shower gifts.
 
Buying clothes, toys, and other baby gear is fun, but I think there is something special about adding a homemade gift. I especially like to add something that is better quality than what you can buy. You know, homemade blankets that are actually big enough for the baby to use after their first month, or towels that actually absorb the water. Novel thoughts, right?
 
My babies have major acid reflux. No, not the "oops, looks like you got a little white stuff on your shirt" type of spitting up, but the "5 gallons of milk just came back up all over you, the baby, the baby carrier, and the diaper bag at church and there is definitely no salvaging this" type of spitting up. It is awesome...
 
Needless to say we go through a lot of burp cloths. And with two previous spitters, I can say with confidence that not all burp cloths are created equal.
 
So, what's my favorite homemade gift to add?
 Burp cloths!
 
Here's what you need:
Gerber cloth diapers
Ribbon
Coordinating thread
Sewing machine
 
You essentially could just dye the white burp cloths and call it good if you don't happen to sew. I think a rainbow of colors would be an awesome baby shower gift. I just really do not like dying things. Truth, I'm not good at it.
 
Cut your ribbon to about an inch longer than the length of the burp cloth. Pin your ribbon down on top of the two seams that are on the burp cloth. I tucked the two ends of the ribbon under so there would be no raw edges before I started sewing
Now switch your machine to a tight zig zag stitch and sew along both sides of the ribbon. This takes a little time, because the stitch is so tight, but it looks really nice when finished.
 
And just a quick side note, I left my bobbin white so that it would blend in with the underside of the burp cloth. But that's just my preference.

Friday, October 25, 2013

DIY Coming Home Outfit

Back in August, my sister-in-law sent me a pin on Pinterest asking me if I could make this outfit from an Etsy shop. Knowing that I could totally replicate it, and that I definitely could do it for way less than $24, I told her yes.
I kept some things the same, but added my own style, too.
 
I chose a lighter grey chevron and a dark pink onesie. Did you know that Hobby Lobby sells onesies for like $3.99 and then you can use a 40% off on top of that?  I also chose to have my bow tie go all the way around the onesie rather than just at the front. I like that it hides where the onesie and the material meet. And finally I found a giant rose for pretty cheap at Hobby Lobby and added that right to the center of the bow.
Cost breakdown:
Onesie: $2.40
Chevron material: already had, but let's say $1.50
Black material: $0.40
Flower: $1.80
Total: $6.10
 
 
That is quite a savings by doing it yourself, or finding a generous family member to do it for you! ;)
 
So the next time you find something super cute on Etsy, pause before hitting the "purchase" button and find out if you can do it yourself.

Wednesday, May 22, 2013

Maxi Mayhem

I seriously can't stop making these! I made five for a friend and three for me so far, not including the pint sized ones I have made. And I have fabric for five more! Can you have too many maxi skirts? Please say no...
 
Seriously head over and start making your own. You will not be sorry!

Thursday, May 9, 2013

Maxi Skirt Tutorial

Once I realized how ridiculously simple these skirts were to make, I have been whipping them out like crazy!
This tutorial is really simple, so don't try to over think it. Also, it involves some basic addition, so bust out those calculators if you need them!

1. Cut your waist band pieces. You will need two rectangles that stretch across your hips. To find the size measure around your hips. For example: my measurement was 33". Then subtract 2" from that number.  For the "height" the basic measurements call for a 16" piece. That way when it is folded and sewn it is 8" and then essentially folded again over itself when you wear it, it is 4". I cut this a little short because I have a shorter torso.

2. Cut you main pieces. You will need two of these again with the stretch going across your body. This is where you need to do some math. To find the width of the top of the skirt, take your band measurement and add eight inches. Then find a bottom measurement by just cutting your piece at an a-line until you hit the edge of the fabric.
Example:
My hips are 33"
33"-2"= 31"
31"/2= 15 1/2" (Divided by two for the front and back panel)
My waistband was 15 1/2"x15"
31 + 8= 39"
My fabric width was 56"
Once you have these numbers you need to place your fabric right sides together and then fold the material hot dog style again. This will make it where you only make one cut. But doing this means you need to divide your two numbers in into fourths. So, in my case, 39/4=9.75" and 56/4=14".


Yeah... you totally can't read what that says. The drawing points out the line that you make from the top measurement (9.75") and the bottom measurement (14"). You are angling the line out from the smaller number to the larger number. Cut along this line, leaving you with two a-line pieces.

3. Serge, serge,  serge. If you don't have a serger, you can use a zig-zag stitch on your machine. Sew your two main pieces of fabric, right sides together, down the sides. Also sew your two waist band piece together along the tall sides.

4. At this point try on your waist band piece to make sure it fits. If it is too big, meaning you have a lot of stretch in your fabric, cut it smaller little by little. Once you are satisfied with your waist band, continue!

5. Fold your waist band piece over, wrong sides together, and line up the raw edges. Flip your main skirt piece so right sides are facing out. Now place your waist band around the main skirt piece and line up ALL the raw edges. Line up the side seams and pin into place.

5. As you sew/serge, pull JUST the waist band piece. You are pulling on the waist band to stretch it to the same width as the main fabric. Just stretch and sew/serge.

6. After your two pieces are sewn together, iron all your seams. This will snap your fabric right back down to size. Make sure to use lots of steam!

7. Now try on your skirt and cut any excess material from the bottom. No need to hem this stuff, it will just kind of roll over on itself anyway.

Now, about the pink skirt pictured, it is obviously not the same type of skirt. I did several alterations to this skirt because I cut the material wrong and wanted to add a fun ruffle to the bottom. This just shows how you can dress up and add things to this simple tutorial.

Enjoy!

***My awesome friend did a quick photo shoot for my facebook page!


crafterhours

Thursday, May 2, 2013

Fixing a Too Long Shirt

I have a ridiculously short torso. Like REALLY short. Combine that with a larger chest and some shirts can make me look really wide. I try to buy longer shirts but sometimes that doesn't work out very well either.
I bought this shirt at Downeast a couple years ago and have truly never worn it. It is awkward long and flow-y. Not a good combination. But it is also so dang soft and comfy that I just couldn't get rid of it. I knew I needed to fix it, mainly because I have the perfect yellow skirt to wear it with. 
I started by cutting off about five inches from the bottom. I would have cut a little less but there was a tiny hole in the shirt.
Take the bottom section and cut some of the width so that it is more fitted. Then fold it in half, wrong sides together. You are going to be making a band for the bottom of the shirt.

Slip the band around the outside of the shirt (facing right sides together) and pin the side seams so they line up. Now, my shirt piece was a little wider than the band, so slightly stretch the band as you go to match it up with the shirt. Serge/sew the two pieces together and iron. 
Now I have a shorter, more fitted shirt that is still SUPER comfy and soft.

Wednesday, May 1, 2013

Mason Jar Pin Cushion

I whipped up this cute little mason jar pin cushion the other night. I happen to have a bunch of mason jars from my husband's boss right now, so I am in mason jar heaven!
 
I pinned this on Pinterest the other day and thought the overall idea was really cute.
On small change I made was instead of adding thread and other notions to the jar, I added the extra pins. Good storage!

Tuesday, April 30, 2013

Itty Bitty Maxi

We finally made it. Wyoming finally had some Spring like weather! Don't worry, though, it is suppose to snow tomorrow.
 
I ordered some knit off of fabric.com a couple weeks ago and couldn't wait to test out some cute little maxi skirts. I figured it would be easier to test one on her before I attempt one for myself.

Super comfy and super cute! Tutorial coming later this week!

Saturday, April 20, 2013

Quick and Easy Birthday Gift

One of my closest friend's daughter turned eight today. Her dad is currently deployed in Afghanistan and she wanted to wait until he got home for her party. My friend thought it might be a fun idea to throw her a surprise party today, since she knew she wouldn't be expecting it. And she was right! Total surprise.
 
Eight year old girls can be a little tricky to buy for. They don't really play with toys much anymore but are still too young for things like make-up and accessories. One thing I do know is that Camille LOVES skirts. She is definitely a girly-girl!
 
My first thought was to head to Children's Place for some plain t-shirts, but then my sister told me that Walmart had some for half the price and a bunch more colors. My Walmart had about fifteen different colors, and at only $3.47 each, I grabbed four. Then it was just a matter of matching fabric.
I started simple. A brown and cream skirt with a coral top. No frills, just a elastic waist. But definitely one that she can mix with whatever color top.
The next one took me a little to find a good fabric to go with this teal top. I like that the small amounts of teal pop from the skirt. I added a little brown ric-rac to the bottom for some detail.

The black skirt got a little pink binding sewn along the bottom. Instead of sewing the binding over the material like normal, I sewed it behind the main fabric to give a little layer.
The last skirt is my favorite. I added about two extra inches of fabric on the top and top stitched before adding my casing. It gives it more ruffle at the top. Then to lighten up the skirt, I added white ric-rac a long the bottom hem.
 
So easy and fun mix things up with a simple skirt pattern.


Friday, March 29, 2013

Disney Bags

As I mentioned, I am heading to Disneyland in a few days. I am beyond excited! It is a girls only trip, which I have gotten a bunch of crap for, and that means no strollers. My sister and I were brainstorming one day about what we would bring to carry all our stuff. A purse would get obnoxious very quickly. Throwing a card, my phone, and my ticket in my pocket makes me a little nervous. My mom bought herself a Disney Dooney and Bourke purse... not even going to happen! So what else is a girl to do?
Make one!

We ran through several options for fabric until I decided on the chevron. One perk about being the seamstress? You get to be the ultimate decision maker. I followed the same basic tutorial for the Ipad cases using a 7.5 by 9.5 inch measurement, and then just added some straps.
The insides coordinate with our princess shirts, which you will see more of after the trip. I will be sporting a Belle shirt so I went with red for the rose. So excited to get some pictures of my projects in action!


Wednesday, February 6, 2013

Corduroy Dress


I played around with a new dress idea the other day. Probably nothing too new, but I definitely had fun making my own tutorial. I especially LOVE the drop waist, casing tie I added.
 
Tutorial coming soon!

Tuesday, January 29, 2013

Rosette Dress

A short while ago Shwin and Shwin posted on Facebook that they were in need of some pattern testers. I was beyond eager. Only problem was that I was at school, on a break, and could NOT get my phone connected to sign up as one of the testers. I called my husband... no answer. I called my mom... no answer. I called my sister... you get the point.
In a fit of desperation, I called my dad. That's right, my good ol' dad totally saved the day and signed me up. Love it! And love the dress I ended up being able to test.
It is called the Every Little Thing dress. So adorable and so versatile.
These pockets might be my favorite thing about the dress.
When I made it this time around, I omitted the big bow and added a little rosette trim I had left over from the camera strap. Love, love, love it!


Tuesday, January 22, 2013

Car Seat Cover

Either I am crazy baby hungry or I was bit by the sewing bug, because I have been sewing nonstop for my friend that is about to have her first baby. Maybe a little of both?
I used sort of a combination between this and this tutorial. I have made quite a few covers so I usually ask the person if they prefer the ribbon ties or the Velcro loops. And then I get down to business.
I kept this one pretty simple, because my friend isn't really into the super girly stuff. I also used flannel because it is January and let's face it, Wyoming is bitter cold. And don't even get me started on the wind here.

Monday, January 21, 2013

Dress Pattern

Honestly... I have never really bought a pattern online. Mainly because you can find so many cute ones for free and a little because I wanted to get really good at sewing before hand.
 
A little crazy? Maybe... But I just never really felt like committing to anything.
http://www.etsy.com/shop/littledresspattern
Until I saw this. Holy of all holies, this dress is beautiful! I did hesitate for about a minute because of the $6 price tag. I can be cheap sometimes.
 
During that minute I contemplated trying to figure it out from the pictures, but then realism set in. So I pushed the buy button and I had to wait a day and I almost died it was instantly mine.
This pattern is awesome. Such a great dress. A little time consuming, but totally worth it. I think next time I may trim down the sleeves a tad. You know, just because. I will warn you, it takes a ton of paper to print the pattern. Again, though, worth it.
 
The fabric is my favorite. I have been hoarding this fabric for over two years. I was pretty excited/scared to cut into it.
 
This pattern was so worth the $6 I spent. I have ideas for an all chambray one and I can't wait.

Wednesday, January 9, 2013

Easy Headbands

A lady from my church gave me a box of random sewing stuff a few months back. In the box were a few pieces of vintage looking ribbon. Sadly, the rest of the box was kind of a dud, so these were pretty much the only things I could use. 
 
I decided to use the ribbon to make some cute, little headbands for Savanah. Anything I can do to keep her hair out of her face. Drives me crazy!
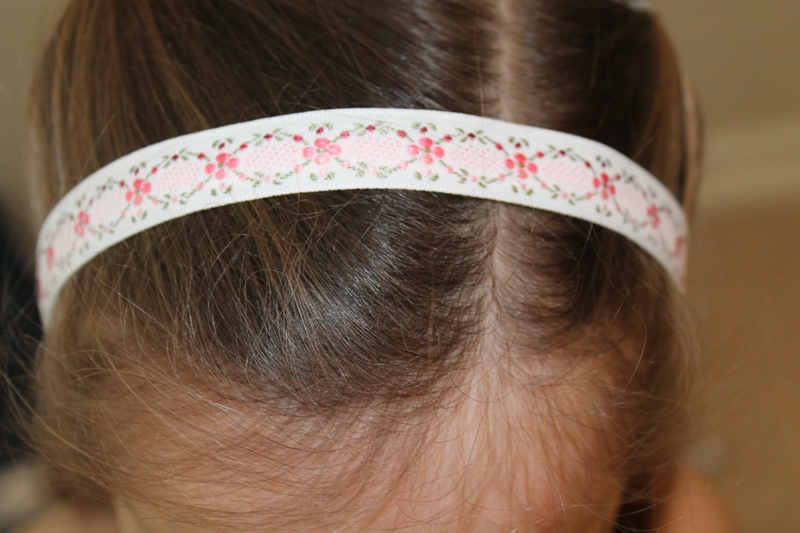
Super cute, right?
 
I began by measuring her head, which was 19 1/2". Cut your ribbon an inch and a half smaller, making mine 18".
Then cut a piece of elastic 1 1/2". Sew the elastic to the ends of your ribbon. About 1/4" of the elastic will end up being your "seam allowance".
 
Super cute and super soft! No more complaining about those hard, metal headbands.
 
Granted she promptly asked for it to be removed so she could continue on with her pony watching business. Such a diva! 
On another note: Guess who finished off one of her spools on her serger? That's right. Such an exciting day for me!

Saturday, January 5, 2013

Vertical Pleats

I have been making a ton of skirts lately. I have a friend that is having her first baby, so I am definitely making sure that she is well stocked. I will admit though, it is making me VERY baby hungry. Curses!
I started by cutting three pieces of material. This skirt was made to fit a baby size 0-3 months.
1 piece (main fabric) 6x28"
1 piece (coordinating fabric) 2x28"
1 piece (main fabric) 2x28"
Serge or sew all three pieces together.
Your fabric will look like this.
Working with the wrong side of the fabric facing up, fold the serged edges towards each other while pressing with an iron.
Like this.
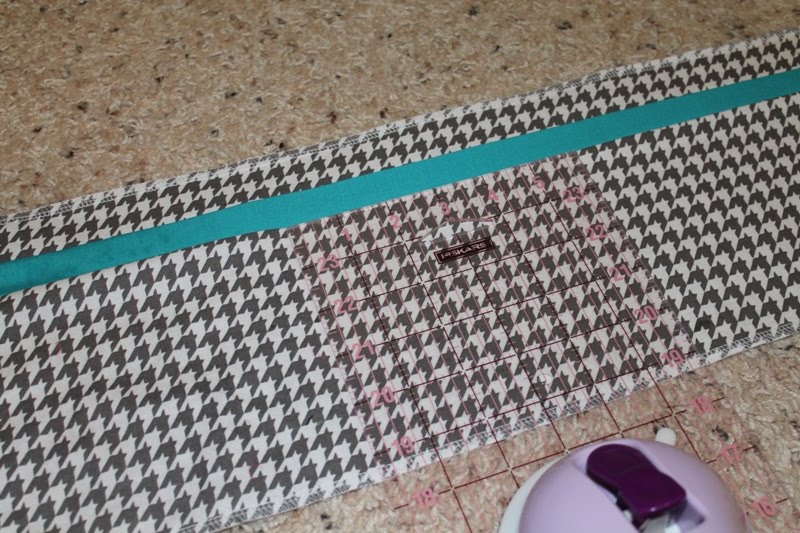
Flip your material over so the right side is now facing up. Using a ruler to keep it even, fold the top (main) fabric down and over your coordinating piece. This will create another pleat. Iron the heck out of your pleats. Seriously, iron a ton!
With rights sides together, serge or sew your fabric ends together creating a tube.
 
 Hem your the bottom of your skirt.
 Along the top, creating a one inch casing for your elastic.
Attach a safety pin to one end of your elastic and begin threading it through the casing. One trick I use is when the opposite end of your elastic is almost gone, pin it so it doesn't slip through into the casing. No one likes re-threading the elastic. No one!
 
Zig-zag stitch your elastic together.
Add a cute little tag or piece of ribbon into the opening and stitch closed.
I was a little worried about my pleats separating so I added a little heat and bond sporadically so keep the pleats down.
So excited for my friend to have her baby and to see her in all the cute itty bitty things I have been making. Why is everything infinitely cuter when it is teeny?