Showing posts with label Savanah's Room. Show all posts

Wednesday, April 17, 2013

Bow Holder

I have been wanting to update Savanah's bow holder for a while now and finally found a frame I loved. I initially was going to use a thrifted frame, but it wasn't holding the paint very well. Then I found these new line of frames at Hobby Lobby. They are white and ready to be painted. No sanding!
 I added some bright pink spray paint and some fun ruffly green ribbon.
They now hold her everyday bows instead of the giant flowers she rarely wears. I wanted something smaller hung up so that the green ribbon would poke through. And it looks so cute! Especially with her bows in color order.


Saturday, November 24, 2012

Jingle Bell Frame

I found this pin on pinterest a few months ago and knew I wanted to use it for Super Saturday. I kept it more traditional for the ladies at Super Saturday but wanted something a little more fun for Savanah's room. The link on pinterest doesn't lead anywhere, so not sure who the original creator was.
 
I bought the shadow boxes at Joann Fabric when they were 60% off. Shadow boxes can be a little pricey and Joann's seemed to have the best prices. Mine are the 10x10 inch frames. The Jingle bells were purchased at Hobby Lobby when they were half off. I was able to use one container of bells for two frames.
 
Start by opening up the back of the frame and gluing a piece of paper to the inside of the frame back. I chose a bright pink, sparkly paper from Hobby Lobby. Next, fill your frame with about half of the bells in the container (about 37 bells for mine) and try to arrange them before putting the back on the frame. This is because the bells will fit snugly in the frame once the back is on. Lastly, wrap your frame with coordinating ribbon. I used dabs a hot glue to keep it secure to the frame.
Cut out the words "jingle all the way" with vinyl and a super cute font and slap it on the front of the glass. I definitely suggest using transfer tape with vinyl because it makes it about five thousand times easier.
 
Savanah was pretty excited when she woke up and found it in her room. Now Landon has requested a boy one, better get going on that!

Tuesday, October 23, 2012

Name Plaque

Before we had kids, Shawn decided on a name for a baby girl. He was adamant about it. He heard the name from someone that came into the bank and instantly fell in love with it. When we got pregnant with Landon he told me I could pick his name, if he could name our daughter. A while after we became pregnant with Savanah, and he cashed in his chips. I guess it is a good thing that I loved her name, too!

The only other thing he insisted on was only having one "n" instead of the traditional two. Fine with me. Although, even after almost four years, I still look at her name and wonder if it is spelled right.
Once we find Savanah a bed, this plaque will hang from the foot board. I saw something like it at Pottery Barn and really loved it. Again, once we find a bed...

I also divafied this paper mache' star I found. Just a little paint, ribbon, and some glitter. Am I alone in thinking that glitter makes everything better?

Tuesday, September 25, 2012

Growth Chart

Growing up in California, my parents had a closet that is marked to the high heavens with all of our heights over the years. It even has markings for a few kids my mom did daycare for. I love looking in that closet. So much so, that if my parents ever move they will need to cut it out and take it with them.
I know I have mentioned several times that we have moved a lot. Eleven times in ten years, a lot. So marking up some door frame just wouldn't make any sense. Everything I make needs to be portable!
This was so easy. My sister and I got together one day back when we lived in Utah. I had the good people at Home Depot cut the 2x6 for me. We painted them to match our kids' rooms, marked out our spaces, and then slapped on some vinyl. If you don't have a Cricut or Silhouette to cut the vinyl it will be more time consuming.

The only change I would make would be to add a hanging thing to the back, so I could hang it from the wall. I have Tana's sitting on the floor and it occasionally gets knocked over. But if I were to hang it now I would have to adjust all the vinyl pieces. I am a little too lazy for that!

There are so many different growth charts out there now, so you can do a quick Google search and find a ton of pictures! My new favorite is the stained wood one that looks all vintage. Way cute!

Wednesday, September 5, 2012

Girly Decor

 While having a girl has proved to be somewhat of a challenge at times, it does have its perks.
 
Decorating her room has been so much fun. There really is a TON more girly stuff out there.


This set of letters is by far my favorite part of her room. It is literally what I based the rest of her room around. My most awesome Aunt Nell bought them for Savanah when she was a baby.I stressed and stressed about what colors, papers, and embellishments to choose. I think it went well.
The sign is hanging in the middle of her dresser/shelves/changing table thing. I bought the metal sign from Roberts in Utah. Are they really almost all gone? I loved that place, especially on Black Friday! I found a saying that I liked, and thought fit our little diva well, and cut it out in vinyl. And, oh how true this quote has proved itself to be!

The last project was the cheapest and easiest thing ever. Decorating with plates has been popular for a few year now. You can find plates absolutely anywhere. This particular one was found at the Dollar Tree. I have purchased plates from the Dollar Tree, DI, Tai Pan, Target, and just about anywhere else you can think of. I cut a simple design out of vinyl and left it at that.
 
Decorating a room can be a ton of fun and really doesn't have to cost a lot of money. Win, win!

Monday, September 3, 2012

Bow and Flower Holder

 A while back I posted this tutorial. I realized today that I never posted about the flower holder. I also just noticed that one of the flowers is missing from its spot. NOT good for my OCD!


This was such an easy project. And as long as you know how to use a glue gun, you will be fine! 

I started with an unfinished frame from Hobby Lobby. You could definitely use an frame you have, just take off the back and the glass. I painted the frame white to match Tana's room and added very small vinyl decals just to give it a little something.
Next, find some coordinating ribbon. If you have a staple gun, you could totally use that to attach the ribbon, but I used hot glue. Measure out where each piece of ribbon will go and glue all the ribbon to the top. Once the tops are completely dry, pull the ribbon taut and glue the bottoms.

So simple, yet such a cute "decoration" to any room.

Thursday, April 26, 2012

Closet Love


 I may or may not suffer from a slight case of OCD. This becomes quite apparent when you take a look at my closets. Beyond needing things to look "in place" I find that it makes things run a lot smoother.

I start by always using the same hangers. It looks more streamline. I also face all my clothes the same way, and order them by color and sleeve size. Doing this allows me to really know what clothes are dirty or missing. I can also tell what color I have been wearing too much of.
I like to organize the kids toys in buckets. It helps in the cleaning process. I teach my kids YOUNG that things have a place. They also are only supposed to get one bucket out at a time (we are still working on this with Tana).

The one area that I have REALLY had to let go is the kids' movies. We allow them to stay in Landon's room so they are easily acceptable. For the longest time I was checking several times a day to make sure they were still in alphabetical order, which they usually were not. It was a little too much. I had to let it go! I just try not to think about it...
Now for the best part: my closets really do look like this the majority of the time. My kids know the system and it makes for a lot less clutter!

Wednesday, November 23, 2011

The Princess has Spoken

Although we have never referred to Savanah as "princess", she sure the heck acts like one!  So when I came across this quote on pinterest I knew I had to make it.

I found the perfect frame at HL. I wish I had a before picture to show you.  Imagine: white satin ribbon tied in a bow that the picture was hanging from, blue and white striped background, and a wooden letter in the middle.  It was cute, but definitely for a nursery.  I started by taking off the ribbon.  I then carefully hammered off the back of the shadowbox frame.  Finally, I pulled off the letter and the backing until I was left with a clean slate.

I had a total FAIL the first time around.  I designed the layout in my Making the Cut studio and just printed it from there.  I originally had it on a really cute piece of pink paper, but I went a little crazy with the distressing ink after.  Oops!  

So, I reprinted it on paper I already had and went from there.  I added a little bling to embellish the sides and was a lot more lenient with the distressing ink this time around.  A little glue to the back and I was done.

Warning: DO NOT TRY THIS AT HOME!  I was quite the tater tot while I was doing this project.  Before I glued the two pieces back together, I decided to clean the glass.  Long story short, I slid my hand down the side of the glass at the exact moment that the cloth slipped out of my hand.  Yeah, it hurt.  I might have even had it wrapped in gauze the next day at school.  Maybe... 

Thursday, August 25, 2011

One Organized Princess

Aunt Nell is always sending me emails with great ideas.  I love when I see them in my inbox!  One idea in particular was sitting in my inbox for quite some time.  Sadly, I cannot for the life of me find the email with the picture.  I have also tried googling different words, but nothing!

The idea was finding decorative knobs and attaching them directly to the wall.  The image had vinyl lettering over each knob.  It really is such a cute idea, but because we have moved so many blasted times, I decided to tweak it a little.

I searched for the perfect knobs for a VERY long time and finally found them in Rexburg, ID of all places!!  I got these knobs for $2 a piece.  Beat that! 
Instead of attaching them to the wall, considering we would probably move again in a year, I wanted to make it portable.  I headed on over to Home Depot and found a piece of wood in the clearance bin.  I painted the piece hot pink and sanded down the edges a bit when dry.  Then I measured out the piece and did a little math until I found where I wanted the three knobs.  I enlisted my sister's help to drill the holes and added the knobs. 
Finally, I cut some vinyl with my Cricut and the Storybook font.  I added the vinyl with transfer paper because it makes it so incredibly easy.
Attach hanging brackets to the back and hang it up.  I hung it low enough so that Tana could have easy access to it.  And it looks great under her bow frame.

Friday, April 22, 2011

The Floating Lights

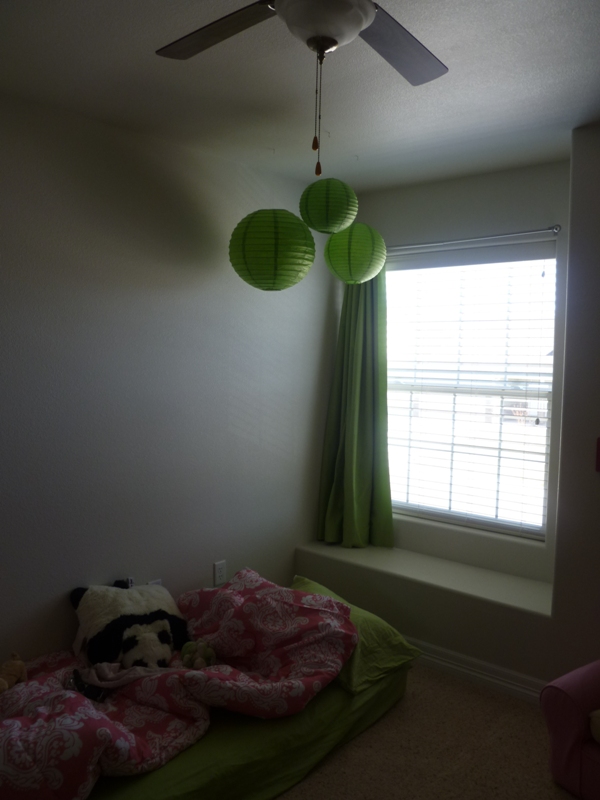
Both Landon and Savanah have a spot in their rooms where it just seems a little too bare.  The problem is if I hang another thing on the wall it will be a little too much.  Such the dilemma.  I have been racking my brain for ideas and finally came up with one for Savanah's room.  I have always LOVED paper lanterns.  I am not sure what it is about them, but I love them.  I found this set at Hobby Lobby (I know, shocker!).  My HL has an aisle where there are outdoor party supplies organized by color.  It is an OCD's dream come true!  This set of lanterns runs about $7.99, but with a 40% off it was only about $4.80. 
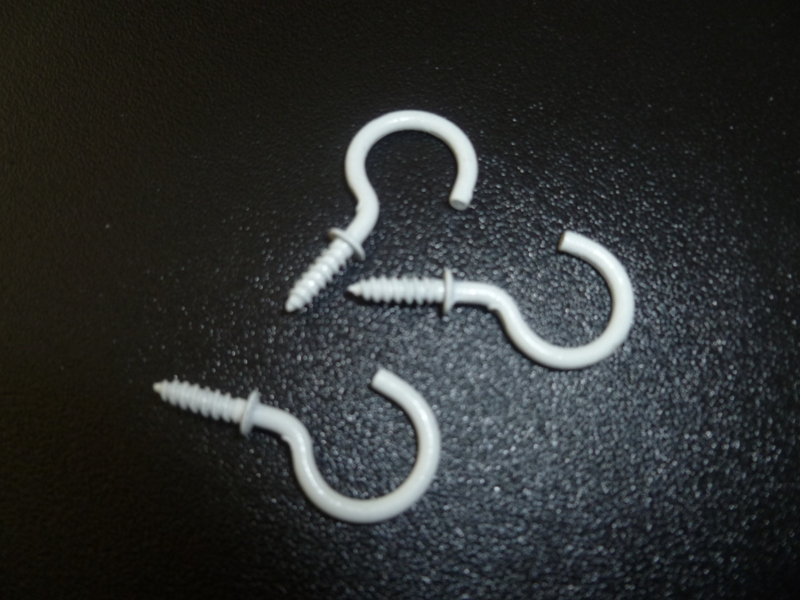
I began by putting the lanterns together, which was just a little tricky.  It also doesn't help that paper lanterns rip really easily.  Be careful!!  I then grabbed the Scotch tape and went to work.  Only, guess what?  Scotch tape DOES NOT hold the paper lanterns up!!!  I know, another shocker.  Again, I racked my brain for another idea.  I found some white hooks out in the garage and figured they would work just fine.
I will say this, those little hooks were a beast to get in the ceiling.  First, looking straight up kind of does a number on your neck, so I would have to look down every once in a while.  When I would look down I would lose the spot in the ceiling where I was making the hole!  Gah!!  Second, specks of ceiling began to fall and with my eyes naturally being open.. yeah... you get it.  When I finally got the hooks in I hung the lanterns from them.
I am thinking it looks pretty good.  Enjoy!
Tuesday, April 5, 2011

Blackout Curtains

In the new house Savanah's room faces East.  What's the problem you ask?  When the sun rises or beats down on her room, she doesn't sleep.  So, child up early plus no nap means not a happy two year old.  Not long after we moved in I began searching for blackout curtains.  Cheyenne is not known for its shopping, so my options were very limited.  It seemed like every set of curtains came in dark brown, navy blue, burgundy, hunter green, or white.  Not really what I was going for.  I decided that I could make my own cuter version and for a lot less than what they were charging.  I found the blackout liner at Hobby Lobby.  It was already on sale for 30% off.  I bought two yards because I pulled a rookie move and forgot to measure the window before I left.  Two yards was more than plenty!  While scoping out the cute fabric I decided that I would keep the window panel solid, as to not clash with her bedding and the pillows I was making.  I also decided that purchasing a single flat sheet that matched her bedding would be the cheapest and easiest solution.

I began by actually measuring the window.  I figured that I wanted I little extra material on the side and bottom of the blackout lining.  I cut the lining about five inches shorter on the sides and bottom.  I made sure that the bottom of the curtain was the part of the sheet with the large hem; the part that goes toward your head when you make your bed.  This way I would not have to re-hem the bottom of the curtains.  Make sense?  During this process I realized that I am in definite need of a bigger cutting mat!  Once my material was cut, I lined up both pieces at what would be the top of the curtains.  I measured each side to make sure that they were even.
 I pinned my two pieces together and then sewed a simple straight stitch across the top so that they would stay together.
The next step was the hardest decision for me.  I knew that if I sewed the sides I would have an awkward looking seam that would not be close enough to the edge.  This wouldn't have been an issue, except I didn't have the exact color of thread.  My green thread is a little darker than the sheet.  I made the decision to use heat and bond instead.  I figured that the curtains wouldn't be washed and handled that often. 
 If you haven't used heat and bond, it is great.  It makes projects that would normally require sewing that much easier.  You simply lay the heat and bond where you want it, fold your material over, and iron. 
I did this to both sides on my curtains.  This way it hides the edges of the lining without sewing them. 
 The final step was to finish the top.  Since I had already sewed the two pieces together, I just folded the material over twice to hide the unfinished edges, pinned, and sewed a straight line across.  I am using curtain rings that have clips so I did not have to add a hole or loops for the rod to go through.  After clipping my strings, I ran a lint roller over the entire thing, and ironed it flat.  Enjoy!