Showing posts with label Halloween. Show all posts

Thursday, November 15, 2012

That Time I Made a Costume

I loathe, and I mean really loathe, making cotumes. Halloween is my favorite holiday and I do not like wasting my time making a costume that I should be able to just buy. Old Navy makes my favorite costumes. They are cute and warm and really inexpensive. I picked up Savanah's back in August because they tend to run out. 
 
Old Navy costumes only go to size 5T, which means that I have had to find other costumes for Landon the past few years. Which also means that I have had to resort to buying the cheap looking, polyester kinds, which really are not that cheap! Not this year. This year Landon insisted on being a spider, and I just couldn't find a spider his size anywhere.
So what's a mom to do? Begrudingly make one...
Some googly eyes glued to a beanie, and tubes of black fabric stuffed with batting and strung together with embroidary floss. Ta-Da! The easiest spider ever. Not the prettiest, scariest, or even the coolest, but definitely the easiest. And he loved it.

Wednesday, November 14, 2012

Make Your Own Crayons

I have seen a few other bloggers make crayons before and have always wanted to try it out. Jill has made some super cute ones over the years. She even links you to where she bought the molds. I didn't plan ahead as well as she did, but it still worked out.
I was asked to plan Landon's class Halloween party this year. While looking for things to put in little goodie bags I walked past these ice cube trays at Dollar Tree. Bing! (that would be the light bulb going off in my head)
I grabbed our giant bag of crayons and got to work separating them by color. The worst part was definitely taking off the wrappers. Granted I did think of a more efficient way. I used a steak knife and slid it across the crayon vertically. Then had the kids peel the wrapper right off. Such a time saver!
Making crayons is fun!
I filled a small pot with water and brought it to a boil. Then I threw the crayons into the can and mixed them until they melted.
 
Making sure to ALWAYS use an oven mitt, I poured the melted crayons into the molds. I let the molds set in the freezer until they were solid.
They all popped out pretty easily. The only issue I ran into was that left over crayon was stuck in the molds, so it left some crayon residue on the other colors. I think it gave the skulls some character. Kind of like marble.
Fun, new crayons that the second graders loved!
 
Side note: I could never get the crayon out of the ice cube tray, so I just tossed it.

Thursday, October 18, 2012

Halloween Week: Books and Bottles

I have my more cutesy Halloween decor on my sofa table. The kids' countdown blocks, my ceramic figures, and these fun books and bottles. The books were as simple as covering thrift store books with paper and embellishments. We made them one craft day while still living in Utah. Aunt Nell found the awesome labels and I found the spiders at Wal-Mart.
 
The jars were found in a consignment type store in Utah. We printed out more labels and I burned them up a little for effect. My sister added some liquids to her bottles, but I never got around to that.
 
As much as I love my vintage decor that covers most of my house, I still like to have some more kid friendly decor that the babies can appreciate.

Wednesday, October 17, 2012

Halloween Week: Spider Web Frame

My friends and I decided that this would be an awesome craft night project.
I hung it on the door that leads down to our basement. I cannot, for the life of me, get a good picture of it. They are all dark.
 
If you decide to make one, realize that the Rustoleum spray paint takes a long time to dry. Most everyone had to take their stuff home from our craft night and finish it later.
Now that it is hung, I wish I would have added more cross strings. I only have eight but I like how Dana has twelve. It looks a little more finished, don't you think?

Tuesday, October 16, 2012

Halloween Week: Wreath

This wreath was kind of a pain in the butt. Like an itchy, pins wouldn't hold the burlap, pain in the butt. Thankfully it will stay up ALL year long.
I found this clip-on spider from Wal-Mart for a little over a dollar. He is huge and I love him! After Halloween I can simply unclip him and put something fall-ish in his place.
 
Although a pain, the wreath is pretty awesome!

Monday, October 15, 2012

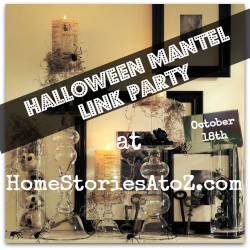
Halloween Week: Mantle

We interrupt this weeks' regularly scheduled posts to have some Halloween fun!
I love decorating my mantle for Halloween. It is one of my absolutely favorite things to do and I might have started a little early this year. Like... early September... maybe...
 
Here is my mantle from last year. I added a few little things here and there, but I am pretty happy with what I have already collected. My decor is very muted and simple. I don't really go for the loud Halloween decorations, instead I usually opt for the black and white, vintage stuff.
I hung my skull plate this year, but had a slight accident in the process. If you look at last year's post, I had this really cute apothecary jar that I put rocks and a skeleton in. I loved that jar. Key word being loved.
 
I got a little lazy and tried hanging the plate by taping ribbon to the back. That lasted about five minutes. The plate fell off the wall and totally shattered my apothecary jar. Sad day! Needless to say, I learned my lesson and properly glued the ribbon to the back.
My favorite is still the jars I made. Dollar Tree vases glued to finials from Lowe's that I painted black. So easy and so cheap.
My Dollar Tree graveyard. I painted them all black and distressed them a bit.
New this year is my black, felt garland. Cute little guys. I picked it up from Target after Halloween, so it was pretty dang cheap.
 
I love Halloween!
 
Skip To My Lou

 
Halloween Mantels

Wednesday, September 28, 2011

Halloween Mantle

If you know me well, then you know that I LOVE HALLOWEEN.  Ironic since I am scared of absolutely everything!  I was so excited for Halloween this year that I started decorating about half way through September.  I wanted the spooky goodness to last.
When I saw this page in the Pottery Barn catalog last year, I knew I wanted to make something very similar.  I found the glass vases from Dollar Tree and glued them to painted wood pieces from Home Depot.  I have NO idea what they are called.  The skulls were also found at DT last year.
Also stolen from this page was the apothocary jar look.  I spray painted the rocks and was planning on writing on them with chalk.  Well, I changed my mind.  Instead I added a DT skeleton and an awesome spider from Quilted Bear.  Oh, how I miss Utah in the fall.  Tear!

Now for a little ghetto...
I love the look of the dead tree branch.  Pottery Barn did this last year and I knew I wanted to mimic the idea.  I have been on the lookout for branch for awhile now.  Shawn made fun of me because I was constantly scoping out the trees.  The moment finally came last Saturday.  I headed out to pick up a pie and happened upon the perfect tree.  It was right in front of the restaurant where I was picking up the pie.  I parked my car right next to the tree, went in and picked up the pie, and then casually "checked out" the tree.  I hastely ripped the branch off, threw it into the car, and drove away like a bat out of hell.  When I got home, Shawn just looked at me and shooked his head.  I wanted that branch and knew it would be mine!!  A little black spray paint and it was perfect.
Love skulls!
I used the same concept here with the skulls and the Spanish moss.  I like the idea of using simple orange branches because they can easily transition into my Thanksgiving decor.
The birdcage is a little hard to see.  I covered the bottom with a layer of Spanish moss and added some extra skeletons trying to "escape the evil bird".  My crow is another DT item.  I also threw in a battery operated tea light.  It flickers and adds a little extra "spook"!
I have other Halloween items around the house, but this mantle is my "showstopper"!  Love it!!

Thursday, September 15, 2011

I See You

I LOVE Halloween!  Like REALLY LOVE Halloween!!  It is by far my favorite holiday.  The decorations, the costumes, the candy.  What's not to love?
I have had a few of these glass on glass frames for awhile now and have been trying to figure out what to do with them.  Enter Martha.

I ran across this tutorial the other day while perusing the Martha Stewart website.  I adapted mine a little but kept the same process.  The main difference was that I only used the glow in the dark glitter.  Totally love that stuff.  I also have not decided if I will add the Mylar in the back.  If I do, my sister had this AMAZING idea to buy a balloon at the Dollar Tree and cut it open. 
I bought the handle at a store in Washington.  They were on sale for $1 each!!!  I glued the handle to the frame and then added the ribbon as an embellishment.  I bought the letters from Hobby Lobby, painted them orange and distressed them.  I found the glittery spider from Walmart.  They come in a BIG package of black and green for $0.97 and are actually confetti.

Such a fun, simple idea.  The eyes are a great addition to my Halloween decor!