
Wow! It's been awhile. Between the end of the school year, our trip to Utah, and sewing for other people I have been pretty busy. I did manage to find some time to make a few things for the blog, but just not a lot of time to post about them.
There are so many things you can do with a men's shirt. If you look on most any blog you will probably find a tutorial for a dress, but I wanted to try something different. Shawn has quite a few dress shirts from his Wells Fargo days that he doesn't wear anymore. Usually I am the type to just get rid of things, but I held onto a few of them.

This is the shirt I started with. I laid it out as evenly as possible, so that I could cut through both the front and the back at the same time.

I cut the shirt as close to the top as possible so that I can use the bottom of the shirt for another project. I didn't measure the width of the skirt I just cut as much as a could. For the length of the skirt I just measured how long I wanted it to be on Savanah.

Take the two pieces of the skirt and place them right sides together. Sew (or in my case SERGE!!!) the two shorter ends together. This will create your tube. I quickly hemmed the bottom of the skirt before moving onto the top.

I had one button that was in the way at the top of the skirt, so I ripped that baby right off.

Next, I created a waistband for the top of my skirt. I did this by cutting the sleeves. I decided how thick I wanted the waistband and cut my pieces. Your two pieces should be just as long as your main skirt tube.

Take your two waistband pieces and sew the short ends together, creating another tube. Fold the tube in half with the wrong sides together and iron flat. This will give you a finished edge at the top of the skirt.
Apparently I struggle and didn't take pictures of the next step. You will place the main skirt tube (turned the right way) inside the waistband tube. The raw edges should line up at the top. Sew the two pieces together.

Iron the waistband and main skirt so that the seams are pressed. It should look like the picture above. To finish it off I sewed a top seam close to the edge.

Now, if anyone can come teach me how to make a button hole that would be great, but until then... I ripped two holes through the top layer of the waistband, making sure that they were fairly even.
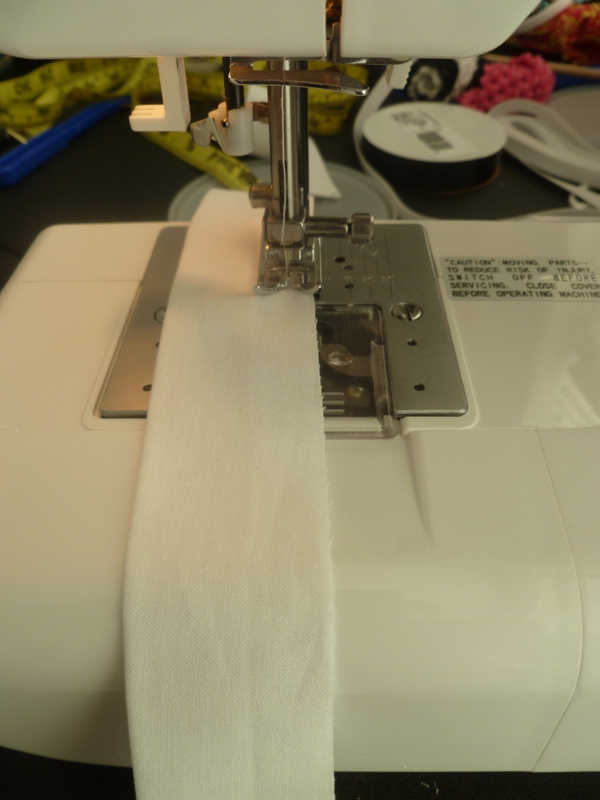
I rummaged through my ribbon stash but couldn't find anything I liked to go with the skirt. Instead I used a piece of white material to make a tie. Cut two pieces of material at about 3" wide. The length doesn't really matter, as you will cut them down later. Fold the pieces in half hot dog style and iron flat. Sew across one short in and down the entire length of the material. Make sure to leave the bottom end open so that you can turn your piece. Turn your two pieces right side out and iron flat. This is where I figured out how long I needed my ties to be. I trimmed both pieces down a couple inches.

I then measured a piece of elastic that was about three inches smaller than Savanah's waist and began pulling it through one of the holes. With one end of the elastic still sticking out, sew the unfinished edge of the tie to the end of the elastic. Make sure to use a zig-zag stitch! Now pull the elastic all the way through the casing until it comes out the other side. Sew the other tie to this end of the elastic. You will want to pull the elastic into the casing so that the sewed edges are tucked in.

Because the openings are raw edges I tucked the edge under and sewed a straight line down . This will not only clean up the edge, but also keep your elastic and ties in place.

Tie the two ends together and you are done! Think how cute this could be in stripes. The best part is that it was absolutely free! I already had everything on hand.
<a href="http://www.alittletipsy.com/search/label/DIY%20under%20%245"><img alt="DIY under $5" src="http://i466.photobucket.com/albums/rr29/Telsee/diyunder5.jpg" border="0" /></a>