Saturday, April 23, 2011

Church Bag

I have been carrying around the kids' church stuff in a black bag I got as a bridesmaid gift.  It is just really boring and kind of starting to come apart.  I have a bunch of cute material in my stash and thought I should put some of it to good use.  I googled tote bag patterns and picked the first one that caught my eye.  I really wish it was bigger, but beggars can't be choosers, right?  I used this free pattern.  I am sure if I looked harder I could have found exactly what I wanted, but alas... 

Friday, April 22, 2011

The Floating Lights

Both Landon and Savanah have a spot in their rooms where it just seems a little too bare.  The problem is if I hang another thing on the wall it will be a little too much.  Such the dilemma.  I have been racking my brain for ideas and finally came up with one for Savanah's room.  I have always LOVED paper lanterns.  I am not sure what it is about them, but I love them.  I found this set at Hobby Lobby (I know, shocker!).  My HL has an aisle where there are outdoor party supplies organized by color.  It is an OCD's dream come true!  This set of lanterns runs about $7.99, but with a 40% off it was only about $4.80. 
I began by putting the lanterns together, which was just a little tricky.  It also doesn't help that paper lanterns rip really easily.  Be careful!!  I then grabbed the Scotch tape and went to work.  Only, guess what?  Scotch tape DOES NOT hold the paper lanterns up!!!  I know, another shocker.  Again, I racked my brain for another idea.  I found some white hooks out in the garage and figured they would work just fine.
I will say this, those little hooks were a beast to get in the ceiling.  First, looking straight up kind of does a number on your neck, so I would have to look down every once in a while.  When I would look down I would lose the spot in the ceiling where I was making the hole!  Gah!!  Second, specks of ceiling began to fall and with my eyes naturally being open.. yeah... you get it.  When I finally got the hooks in I hung the lanterns from them.
I am thinking it looks pretty good.  Enjoy!

Thursday, April 21, 2011

A.C.Utes!

Not really sure the title will come off the way I wanted it to.  It sounded so clever in my head.  Oh well...  Shawn has been pestering  lovingly reminding me that he has a bag of ACUs in the garage that he wanted me to do something with.  Apparently I wasn't getting the hint so he brought them up to my craft room.  I pulled out a pair of the pants today to see what I could do.
I just kind of went with it, so it has a few flaws.  Luckily I have about eighty pairs to work with.  Not even sure who it will fit.  It is a little over 10" long and about a 24" waist.  When I make more I will actually do some measurements!  This one needs a home!!

Sunday, April 17, 2011

A Prized Heifer

While perusing Michael's yesterday with my mom, we came across a display of these old fashion ribbons.  They had a variety, but I was naturally drawn to the teacher one.  I snapped a quick picture so that I could reference it later, because I knew I wanted to duplicate them.  My mom had also mentioned while we were there that she wanted a Martha Stewart tool that a friend of hers had.  It is a large scoring tool that even has instructions for making your own envelopes.  Pretty cool.  She bought one and I decided to test it out today.
 
I began by pulling out a few sheets of coordinating paper.  One thing to know is that with this tool you have to be careful with lighter paper.  I started pushing as hard as I did with the card stock and ripped my first piece.  I cut my back accordion to 2" wide by 12" long.  You will need two of them.  Then using the scoring tool I scored my paper every half an inch.  If you do not own a tool like this, just accordion fold your papers.
You will end up with something like this. 
Next you want to attach the two strips together so that you can turn them into a circle.  I tried two different approaches to this and found that the second way looked a lot cleaner.  Start by folding one side on your strip under, like pictured above.  You will then add some sort of adhesive or glue dots to that side.  You will then place it on top of the other sheet so that the folds line up and the accordian-ness still works.  Once you have attached both sides you should have a circle.
The next part is a little tricky.  You have to manipulate the paper until it lies down into a circle.  I simply pinched the folds together until I could get it to move.  If you are having a lot of trouble with this Google a video to help.  Then you need to glue a piece of scrap to the back so that it stays put.  It doesn’t have to be pretty because it will be covered.
I added a piece of paper between my two accordion pieces for a little more depth.  I don’t have a bunch of circle punches so I just found something around the house to trace.  This is probably common knowledge but please trace the circle on the back of the paper so that no lines ever show up on the front side.  Glue your circle on top of your accordion.
The next accordion was made from two strips measuring 1 ½” wide by 12” long.  I followed the same directions as above to make this accordion.
Glue in place.
Then your final circle is traced, cut, and then glued on top.  This is also where you could add a saying or some embellishments to the ribbon.  Now rummage through all that ribbon that I know you (and me) are hoarding.  Grab several different textures and styles to give your piece variety.
Attach the ribbon to the back using hot glue.  I lined my ribbon up before gluing to make sure they were exactly how I wanted them.  Don’t worry about the length, you can always snip them after.  After attaching the ribbon I cut another circle out of paper to put on the back.  I wanted it to look clean.
The finished product!  I haven’t added anything to the black one yet, but the possibilities are endless.  You could make them ribbons like they were in the store.  You could attach them to a wooden skewer and they can be wands.  You could put them on top of a present instead of the typical bow.  So many fun things to use them for.  Enjoy!

Friday, April 15, 2011

Hoppy Easter

Cheesy?  Eh.  All over the internet people are using bird nests in their decor.  I have seen several different adaptations of it.  From places I definitely can not afford like Pottery Barn and Ballard Designs, to all the DIY bloggers out there that made their own.  I decided to jump on the bandwagon and picked up a few supplies at Hobby Lobby.  Side note: Since moving to Cheyenne you will hear me talk in abundance about HL because it is sadly the only place to shop here. 
 I purchased two grapevine wreaths for about $0.85 since they were half off.  They have several different sizes.  Mine measure about 6" in diameter.  The Spanish moss was not on sale but I used my 40% off to make the entire bag $1.20.  The Easter eggs are a smaller size than normal eggs.  I got the bag of eggs (12) for $1.00.  The great thing is that you can make two nests for about $3.05!
I began by placing my wreath on top of a piece of felt.  Using a marker, I traced the inside of the wreath so that I would know exactly where to cut.  Once finished, I cut the felt out and glued it to the bottom of the wreath.
Then spread plenty of hot glue around the felt and add your moss.  There really is no rhyme or reason to how you do it, but just try to make it look as natural as possible.
Now onto the eggs.  My original plan was to paint the eggs white and then speckle them with brown.  Yeah... didn't so much go as planned.  I took the eggs outside and figured I could spray paint them.  Apparently the eggs were WAY too light for the force of the spray paint, and it really didn't adhere to the plastic.  As you can clearly see...  My next plan was to decoupage book pages onto the eggs, but it seemed like a lot of work for something that I was not sure would even turn out.
 Finally, plan C.  As I was searching through my craft stuff for said book I came across a ball of twine.  I had plans on making decorative balls with the twine and figured the same process could be put to use on the eggs.  You simply wrap the twine around the eggs, adding small amounts of glue as you go.  Side note: be careful with the glue.  Obviously.  But I currently only own a high temperature glue gun and burned the dickens out of my fingers.  So spend the $4.00 and buy a cheap regular glue gun!  You can see how I started the egg in the picture above.  That is probably the hardest part.  When you get to the top you finish it off the same.  I added a little more glue to the top to make sure the end piece stayed put.
This is what the final project should look like.  I did all twelve in about an hour while watching Greek on Netflix.  Simple, mindless work.  Enjoy!

Thursday, April 14, 2011

Handkerchief Skirt


My sister was browsing V&Co the other day when she called and told me about this cute skirt tutorial.  Side note: One day I too will actually take cute pictures of my projects.  Until then...  After checking out the tutorial and realizing how ridiculously easy it was, I ran over to Hobby Lobby.  One of the many things I love about HL is that they have a huge variety of everything.  The handkerchief section alone has at least 50 different designs.  And at $0.99 a piece (okay, some are $1.99) who can resist?   
I initially picked up two designs to test the tutorial out.  Another great thing about HL is their fabric section.  I always go there when I need a simple, plain fabric.  Their broadcloth is always $2.99 a yard.  While broadcloth may not be the most expensive looking fabric, it is great for simple details, like the bottom strip on the skirts.  I purchased 1/4 of a yard ($0.75) of the broadcloth, which was enough for the bottom of two skirts.  The tutorial was seriously so easy.  The part that took the longest was the ironing.  I thought about skipping it a couple times, but remembered previous experiences that didn't end so well.  This is the perfect project for beginners.  Simple straight line sewing and a couple cuts.  The only thing I adjusted was the width of my bottom piece.  I wanted it to be a little more prominent, so I measured it at 5" rather than 4".
Savanah wore this skirt to church last Sunday.  In a whim I put a hot pink tutu underneath it to make it fuller.  Love how it turned out!  I snapped a quick picture on my phone before she ripped the skirts off after church.  I may be a little biased, but she is pretty darn cute.  Enjoy! 

Tuesday, April 12, 2011

A Tie for the Sophisticated

I had planned on doing another skirt tutorial, but thought that I would show a little love to the boys.  I think it is a little too easy to get caught up in all the fun girl stuff, so the boys get a little left behind.  Once again, I found this tutorial on Make It and Love It.  If you haven't found this site yet you are missing out.  I came across this site when it was pretty much brand new because one of my really good friends lived by Ashley in Rexburg.  I have been following it ever since.  Ashley has really easy to follow tutorials and is great about doing step by step pictures for all you visual people out there.
One particular tutorial that recently caught my eye was repurposing a necktie into a bowtie.  Landon has several Children's Place ties that I LOVE.  The only problem is that three of them fell apart.  I tried to retie them but they just didn't look the same.  They have been sitting in my craft room for awhile now waiting for the day when I would figure out what the heck to do with them.  Well the day has arrived!  The tutorial was so easy to follow and you don't even need a sewing machine, just some good old fashion hand stitching.  If you don't know how to hand stitch, she has a tutorial for that, too!  The only adjustments I made were I started the initial tie at only 4 1/2 inches rather than the 5 1/2 inches she did for her husband.  I also did something a little different with the neck part.  I started making the long section that wraps around and was getting really frustrated because it was way too thick for Landon's neck.  As I was cutting and ironing and trying to fix it I realized that I could just use the neck piece that was on the original tie.  It is adjustable and snaps open and closed.  No need to sew my own or add any velcro.  I absolutely love how they turned out.  Enjoy!

Thursday, April 7, 2011

Bubble Skirt

 
Or something like that... I originally found the idea for this here.  Now if you look at Ashley's you will notice that is has a lot more fullness in the skirt.  This is where I struggled because my material I was practicing on (hoping that it would work perfectly the first time) wasn't wide enough.  Essentially it should have been gathered quite a bit more.
The main difference is that I started with material rather than making the skirt from an existing piece.  I rummaged through some of my scraps and found the material I wanted for the top piece of the skirt.  Then I noticed that it matched the sheet I used for the curtains perfectly.  I decided to use the leftover material for the skirt lining.  I started by measuring and cutting my pieces.  My top piece should have been a lot wider than it was, but when I went to cut the material it was only 26" wide.  To determine what measurements to use I simply measured Savanah.  Ashley mentions that the lining should hit about mid-thigh.  I followed her directions pretty much exactly.   
The only part I just kind of figured out was sewing the bottom of the lining and the outer skirt together.  I didn't bother finishing either one of those edges like she mentions.  I figured that it would be on the inside of the skirt and I could zig-zag stitch the unfinished edges.  So I sewed the two pieces together, trimmed down the excess material, and did a quick zig-zag stitch to keep it from fraying.  One day I will own a serger! 

Do I love it?  Eh...  But now that I know what to do differently I can try it again on some of my cuter fabric.  If you really want it to turn out looking great the first time, really stick to her directions.  I was a little too lazy to click on the other links and reread older directions.  Especially when it came to the measurements!! 

Tuesday, April 5, 2011

Blackout Curtains

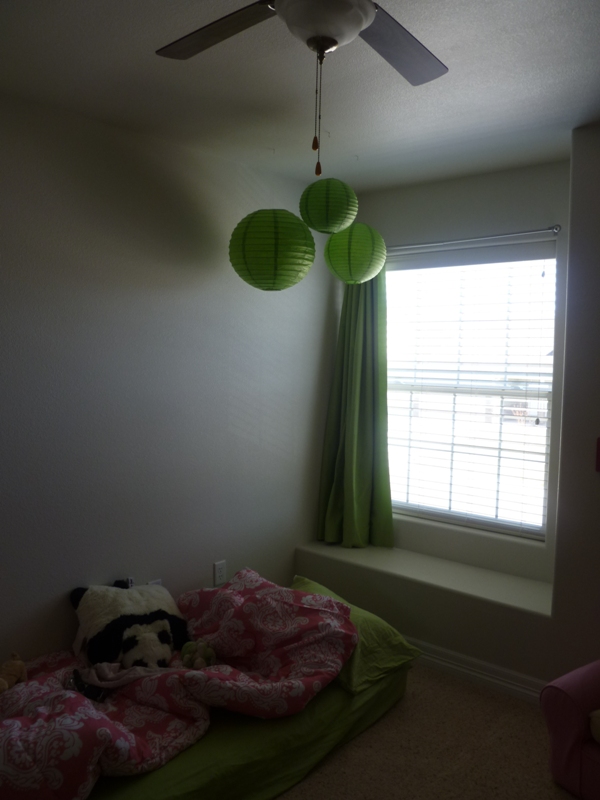
In the new house Savanah's room faces East.  What's the problem you ask?  When the sun rises or beats down on her room, she doesn't sleep.  So, child up early plus no nap means not a happy two year old.  Not long after we moved in I began searching for blackout curtains.  Cheyenne is not known for its shopping, so my options were very limited.  It seemed like every set of curtains came in dark brown, navy blue, burgundy, hunter green, or white.  Not really what I was going for.  I decided that I could make my own cuter version and for a lot less than what they were charging.  I found the blackout liner at Hobby Lobby.  It was already on sale for 30% off.  I bought two yards because I pulled a rookie move and forgot to measure the window before I left.  Two yards was more than plenty!  While scoping out the cute fabric I decided that I would keep the window panel solid, as to not clash with her bedding and the pillows I was making.  I also decided that purchasing a single flat sheet that matched her bedding would be the cheapest and easiest solution.

I began by actually measuring the window.  I figured that I wanted I little extra material on the side and bottom of the blackout lining.  I cut the lining about five inches shorter on the sides and bottom.  I made sure that the bottom of the curtain was the part of the sheet with the large hem; the part that goes toward your head when you make your bed.  This way I would not have to re-hem the bottom of the curtains.  Make sense?  During this process I realized that I am in definite need of a bigger cutting mat!  Once my material was cut, I lined up both pieces at what would be the top of the curtains.  I measured each side to make sure that they were even.
 I pinned my two pieces together and then sewed a simple straight stitch across the top so that they would stay together.
The next step was the hardest decision for me.  I knew that if I sewed the sides I would have an awkward looking seam that would not be close enough to the edge.  This wouldn't have been an issue, except I didn't have the exact color of thread.  My green thread is a little darker than the sheet.  I made the decision to use heat and bond instead.  I figured that the curtains wouldn't be washed and handled that often. 
 If you haven't used heat and bond, it is great.  It makes projects that would normally require sewing that much easier.  You simply lay the heat and bond where you want it, fold your material over, and iron. 
I did this to both sides on my curtains.  This way it hides the edges of the lining without sewing them. 
 The final step was to finish the top.  Since I had already sewed the two pieces together, I just folded the material over twice to hide the unfinished edges, pinned, and sewed a straight line across.  I am using curtain rings that have clips so I did not have to add a hole or loops for the rod to go through.  After clipping my strings, I ran a lint roller over the entire thing, and ironed it flat.  Enjoy!

Monday, April 4, 2011

If you're too school for cool...

This blog is my attempt at duplicating other projects I have seen, while honing in on my own crafting skills!  It is also my hope that it will force me to sit down and craft a little more before I begin teaching again.  And if you are lucky I will throw in some random Glee and Friends quotes!!

So here it is... something I have thought about doing for a long time.  Welcome to what keeps me up at night!