Friday, December 30, 2011

Bubble Skirt: Take Two

Remember back to this post?  Utter fail, right?  It only took me about eight months to try again, but I DID IT!

My sister-in-law sent me some clothes awhile back to re-purpose.  One of the items was this super cute DownEast skirt.  The only issue was that it had some black paint on one complete side.  I knew I could turn it into something for Tana, so I started scouting out my options.
I followed these directions again, but payed better attention this time around.  So if you have an old skirt laying around that you were going to give away, turn it into something cute for a little princess in your life.

Tuesday, December 27, 2011

The Man Mug

My husband likes his milk.  He REALLY likes his milk.  We are always on the look out for really big cups.  We have a few from Ikea, but I was looking for bigger.

I happened upon these huge glass mugs from Dollar Tree.  For a buck each they were worth a try.  And it was a good thing they were only a dollar because I totally messed up one of them.

I bought a tiny bottle of Armour Etch (which is ridiculously expensive btw) and went to work.  A little tidbit of information, do not follow the instructions on the back of the bottle.  I did not leave it on long enough the first time, so I had to try again.  Sad day.
I labeled one "The Man Mug" and the other "The Chuck Norris".  My husband and I have a little joke about Chuck Norris, so I decided to squeeze that in.
I paired the mugs with cases of his favorite soda.  It was a big hit.  Not to mention easy and cheap.  My kind of gift!

Friday, December 23, 2011

The Quilt of Doom

I cannot seem to locate my memory card... thus the all impressive camera phone pic.

This quilt was almost the death of me.  Not that is was hard, just monotonous.  In the end I decided to skip the traditional bias tape binding.  Instead I cut the flannel piece bigger and folded it over the top.  A lot easier and a lot of time saved.

All I know is that he better love it!

Saturday, December 17, 2011

Oh Christmas Tree

I might suffer from a slight case of OCD.  Maybe.  Probably.  And every year when it is time to decorate the tree my OCD comes out in full force.  My kids always want to help decorate and so I appease them until they are out of the room and then hurry and move the ornament to its correct location.  The joys of being crazy!

I have been collecting ornaments and pieces for my rustic tree for a couple years now.  Adding things here and there, usually after Christmas when they are super cheap. 
I struggled for a little this year when it came to the wrapping paper.  I wanted it to flow.  While grocery shopping at the commissary one day, I came across large rolls of shipping paper for only $0.77!  I love how it looks old school and blends in so well.  I also love that I could just write on the paper without using a label.  Fun and cheap!
Here is a close up of a couple of my ornaments.  I found the banner a few years ago at Tai Pan.  I had seen something similar in the Pottery Barn catalog, but the price was much, much, much higher.  The strand of berries and the felt snowflakes are from Target's after Christmas clearance.  The red stars are from Cracker Barrel of all places.  The yellow stars and the suede bells are from the Christmas Store at Gardner Village.  They are always doing sales.  And the large, wooden snowflakes are from Roberts after Christmas clearance.

There are truly so many options with decorating your tree and really inexpensive ways to do it.  You could also mix it up every year with a new theme.

Thursday, December 15, 2011

Christmas Mantle

I love Christmas almost as much as I love Halloween.  Everything about Christmas makes me so happy.  My Glee Christmas CD blaring in the car, the fun holiday movies, and ALL the candies and treats.
It was a sad day when I opened all of my Christmas decor to find it a little lacking this year.  And even sadder when I realized that there was no Tai Pan, Roberts, or Quilted Bear that I could run to.  Not a whole lot to work with here in Wyoming.  Also not a whole lot to work with, with that darn hole above my fireplace.  Curse you wasted space!
I like to keep my decorating simple and themed.  My Christmas decor is definitely vintage rustic.  I love the muted colors.
The garland is from Roberts.  I bought it for super cheap after Christmas.  Best time to shop for next year.  The big sign is also from Roberts.  So sad that they are going out of business.  The fun stars are from this nursery in Prosser.  I bought them after Christmas for about $2 a piece.  My mom bought me the cute tin tree and the nativity plaque.

The bird cage is from Tai Pan and was only $18 full price.  I use it all year.  The little frame is also from Tai Pan.  They have a variety of them for every holiday.  They cost about $3 each.  The sled is from the Christmas store at Garner Village.  It was one of those items that was coming home with me no matter the cost.  Thankfully it was only $10.
My most recent find is something I have been looking for.  I only wish it was bigger.  I just bought it at HL the other day for only $3.  I threw in some pine branches and red berries, also from HL.

Once I find some giant piece to hide the ridiculous hole I will be 100% satisfied with mantle.  Until then.

Monday, December 12, 2011

Tohoku Tote

Remember back to this giveaway?  Well, my little sister just happen to win that one and was so excited for me to make her a bag that she could use at Disneyland.  This giveaway was way back in July and we didn't go to Disneyland until November.  So great because it gave me months to work on it.  Or months to procrastinate and then make it the weekend before...

She requested something deeper and with longer straps.  I began my search and found this bag on I Am Momma Hear Me Roar.  Love, love, love it!
I knew I wanted to mix a nice simple print with a solid.  Joann Fabric has a great selection of fabric called Quilter's Corner.  The full retail price will knock you on your bum!  Like really!  It is only $4.99 and is on sale all the time.  They have a ton of coordinating fabric that is exceptionally cute.  I picked up some of the gray houndstooth and a basic teal and went to work.  My sis decided to nix the bow, not really her thing.
The pattern was pretty simple.  The only issue I ran into was the pattern pieces really lining up properly.  It could totally just be me though.  I think that is why my bag became a little more narrow at the top.
I also added a couple pockets inside for her phone and other things.  And I FINALLY remembered to add my tag to a project.  You can find more about those here.

Monday, December 5, 2011

Error

This is what happens when you serge like you are on crack!  Bad day.  Not only did I have to pay $25 for a new knife, but the worst part?  I have to wait to use my serger until the part comes in the mail.  Gah!  We will return to our regularly scheduled program soon.  I hope!


Wednesday, November 23, 2011

The Princess has Spoken

Although we have never referred to Savanah as "princess", she sure the heck acts like one!  So when I came across this quote on pinterest I knew I had to make it.

I found the perfect frame at HL. I wish I had a before picture to show you.  Imagine: white satin ribbon tied in a bow that the picture was hanging from, blue and white striped background, and a wooden letter in the middle.  It was cute, but definitely for a nursery.  I started by taking off the ribbon.  I then carefully hammered off the back of the shadowbox frame.  Finally, I pulled off the letter and the backing until I was left with a clean slate.

I had a total FAIL the first time around.  I designed the layout in my Making the Cut studio and just printed it from there.  I originally had it on a really cute piece of pink paper, but I went a little crazy with the distressing ink after.  Oops!  

So, I reprinted it on paper I already had and went from there.  I added a little bling to embellish the sides and was a lot more lenient with the distressing ink this time around.  A little glue to the back and I was done.

Warning: DO NOT TRY THIS AT HOME!  I was quite the tater tot while I was doing this project.  Before I glued the two pieces back together, I decided to clean the glass.  Long story short, I slid my hand down the side of the glass at the exact moment that the cloth slipped out of my hand.  Yeah, it hurt.  I might have even had it wrapped in gauze the next day at school.  Maybe... 

Thursday, November 17, 2011

Safety Necklace

I mentioned in yesterday's post that we recently took a trip to Disneyland.  I also mentioned that between the ten adults, there were eight children ages 20 months to 6 years old.  That is a lot of children for that age gap and heaven forbid one of them wander off.

One thing my sister and I decided to do was make tags for our children.  We found this idea and then tweaked it to fit my OCD.  Using ArtsCow, we made dog tags for the kids to wear around their necks.  The great part was that you got to totally customize them.  And they are made with a nice, thick plastic cover on each side.

For the front we found a couple different Disney images to use.
And for the back we added their names and our cell phone numbers.

Thankfully they did not need to be used in the way they were intended.  Although there was one moment in Toon Town where I couldn't find Landon.  We had left Minnie's house and I walked over to Shawn with Savanah unaware that Landon decided to head on into Mickey's house.  Long story short, I found him a few minutes later walking around Mickey's house content as can be.  Not cool!

Tuesday, November 15, 2011

California, Here We Coooommmme

I used to love the TV show The OC.  I started watching is right after I had Landon.  One of my best friends lent me her DVDs so I had something to do while I was home with him.  Shortly after, I purchased the seasons for myself.  The song that plays at the start of the show reminds me of home.  

I am a Californian through and through (except for the lack of blond hair...)

 The first week in November we flew out to California to meet my side of the family at Disneyland.  Ten adults and eight kids, it was awesome!  To make it even more awesome, we all wore matching shirts.  I guess technically they were more coordinating than matching, but you know.

I found the idea here.  I absolutely love that the site has hundreds of images to choose from.  It took us about five months to truly narrow it down to one image per person.  No joke!
My only advice?  Buy the TransferMagic transfer paper and make sure you read what type you are buying.  My sister and I were unaware that we had purchased the light colored paper and tried it on a black shirt.  No dice.  They do sell dark colored paper and it works great, too.  Just be aware of which you are buying. 
You can use this transfer paper for so many projects.  It was fast and they turned out great.  I even added wording to the bottom of our mickey heads.

Enjoy!

Friday, October 14, 2011

Lucky Penny

I recently saw this picture on Michelle's blog.  Although my HL didn't have any jump rings or key chain rings in the right cooper color.  I decided to just use what I had instead.  Still love it.  My mom stamped the word for me since I do not have a set.  A little tip: color in the words with a black sharpie and then wipe it off.  It will give your letters more depth.
I have a second penny that I think I might make a necklace out of.

Wednesday, October 12, 2011

My Own Tags

Oh Pinterst... how I love thee!  I didn't really get it at first and I still cannot really spend a lot of time on there, but it is so nice to quickly glance at a picture without clicking on anything.

I came across this pin the other day and about died.  Such a simple concept.  I had looked into buying tags before but they were still a little too expensive.  This is nice because I already had the transfer paper from another project.

I started by designing a little something in Word.  I found a nice, quick tutorial on how to flip the image.
After printing the images on transfer paper, I cut them out and ironed them onto my ribbon.  Quick tip: place a piece of cotton fabric over the tags before ironing to project your image and your ribbon.
Add your new tags to your favorite sewing projects and admire the cuteness!

Tuesday, October 11, 2011

Ties

I made my sister-in-law these ties for her two boys.  I finally found a tutorial that I liked.  I was so sick of seeing the ones that wrapped around the neck with elastic.  Enter my best friend Pinterest!!
This tutorial was awesome!  Seriously easy and quick.  My sis made like six yesterday.  Also, the best part: CHEAP!

Tuesday, October 4, 2011

Statement Art

Landon has this long wall in his room that has absolutely nothing on it.  All the other walls are decorator, but I could not for the life of me find something for this wall.  It is massive.  I probably should have taken a picture... eh...

I spent months trying to find something.  MONTHS!!!  Hobby Lobby has this print.  I love it but the dimensions were just not big enough.  Everything I found in the right size was WAY out of my budget.  Even out of my " Shawn would kill me" budget.  I knew I wanted some sort of vintage map to go with his Route 66 theme, but nothing.

Enter my epiphany (Insert angels singing: Ahhhhhhhhhhhhh!)
I started at this website, typed in "route 66", and the heavens opened again.  This poster was exactly what I was looking for and only about 12 bucks.  And it was HUGE!  Like 2 ft x 7 ft huge.  I knew right away that there was no way I could afford to frame that bad boy.  My next option: canvases.  I found my canvases at HL and used my 40% off.  In the end I only paid about $10 for all three.

I painted the edges of my canvases a dark grey to match the print.  Then using a cutting mat and rotary cutter (I know!) I trimmed down the poster to fit on the canvases.  This was a little nerve racking at first.  I was deathly afraid that I would cut the wrong measurement and ruin the poster.  With all three pieces cut I used spray adhesive to adhere them to the canvases.  At this point I hung them on Landon's wall but they just did not look finished.  Way too much black and white.  I finally took the time today to bust out the Cricut and cut some vinyl.  I added just a few things here and there.  I did not want to take away from the overall print.
In a nut shell, I love it!  There are still a couple small things I will add to the wall, but this piece turned out perfect.  Such a nice, big art piece for only about $25.  Can't beat that!

Wednesday, September 28, 2011

Halloween Mantle

If you know me well, then you know that I LOVE HALLOWEEN.  Ironic since I am scared of absolutely everything!  I was so excited for Halloween this year that I started decorating about half way through September.  I wanted the spooky goodness to last.
When I saw this page in the Pottery Barn catalog last year, I knew I wanted to make something very similar.  I found the glass vases from Dollar Tree and glued them to painted wood pieces from Home Depot.  I have NO idea what they are called.  The skulls were also found at DT last year.
Also stolen from this page was the apothocary jar look.  I spray painted the rocks and was planning on writing on them with chalk.  Well, I changed my mind.  Instead I added a DT skeleton and an awesome spider from Quilted Bear.  Oh, how I miss Utah in the fall.  Tear!

Now for a little ghetto...
I love the look of the dead tree branch.  Pottery Barn did this last year and I knew I wanted to mimic the idea.  I have been on the lookout for branch for awhile now.  Shawn made fun of me because I was constantly scoping out the trees.  The moment finally came last Saturday.  I headed out to pick up a pie and happened upon the perfect tree.  It was right in front of the restaurant where I was picking up the pie.  I parked my car right next to the tree, went in and picked up the pie, and then casually "checked out" the tree.  I hastely ripped the branch off, threw it into the car, and drove away like a bat out of hell.  When I got home, Shawn just looked at me and shooked his head.  I wanted that branch and knew it would be mine!!  A little black spray paint and it was perfect.
Love skulls!
I used the same concept here with the skulls and the Spanish moss.  I like the idea of using simple orange branches because they can easily transition into my Thanksgiving decor.
The birdcage is a little hard to see.  I covered the bottom with a layer of Spanish moss and added some extra skeletons trying to "escape the evil bird".  My crow is another DT item.  I also threw in a battery operated tea light.  It flickers and adds a little extra "spook"!
I have other Halloween items around the house, but this mantle is my "showstopper"!  Love it!!

Thursday, September 22, 2011

Pleatin' it up!

I'm lovin' the pleats lately!  I have a friend at church who made a cute little outfit for her baby and I started to replicate it.  As I was cutting the pieces, it donned on me that pleats would make this shirt even cuter!

I followed this tutorial.  Only difference: when cutting the front piece, cut it in half taking away a little extra.  Cut an extra piece of coordinating fabric for the middle.  If you want to add the pleats, make sure to place the pleats between the two fabrics before sewing.  Simple and cute!

Oh, and HAPPY BIRTHDAY to my mother in law!

Wednesday, September 21, 2011

NEW Pleated Dress Winner!

Sadly, Kimmie never emailed me so I had to choose a new winner.  Bad for her, good for one of you!
Congrats, Tracy! Email me.

Monday, September 19, 2011

Pleated Dress Winner


Congrats Kimmie!  Send me an email at bretinsley@hotmail.com with the following measurements of your princess: around her chest, from shoulder to knee, and around her upper arm.  Also, if you have a specific color in mind.  You have 48 hours!!

If you didn't win, try following this tutorial for a super easy and super cute dress!  Thanks to everyone who participated!

PS One day I will get this random generator thing figured out!

Friday, September 16, 2011

Leggings

Want to know how to turn this
into this
Check this out!  It seriously took me about 10 minutes.  I love that I can use an old shirt and make it into something functional for Tana!

Thursday, September 15, 2011

I See You

I LOVE Halloween!  Like REALLY LOVE Halloween!!  It is by far my favorite holiday.  The decorations, the costumes, the candy.  What's not to love?
I have had a few of these glass on glass frames for awhile now and have been trying to figure out what to do with them.  Enter Martha.

I ran across this tutorial the other day while perusing the Martha Stewart website.  I adapted mine a little but kept the same process.  The main difference was that I only used the glow in the dark glitter.  Totally love that stuff.  I also have not decided if I will add the Mylar in the back.  If I do, my sister had this AMAZING idea to buy a balloon at the Dollar Tree and cut it open. 
I bought the handle at a store in Washington.  They were on sale for $1 each!!!  I glued the handle to the frame and then added the ribbon as an embellishment.  I bought the letters from Hobby Lobby, painted them orange and distressed them.  I found the glittery spider from Walmart.  They come in a BIG package of black and green for $0.97 and are actually confetti.

Such a fun, simple idea.  The eyes are a great addition to my Halloween decor!

Tuesday, September 13, 2011

Pleats and a Giveaway!

I am a sucker for pleats.  Like an absolute sucker.  So when I was playing around with some new material last night, I decided that pleats were just what this dress needed.

My original intention was to sew gathered tulle to the bottom, but have you ever tried to sew with tulle?  Crazy frustrating.  I did not have the patience for it last night.  I am definitely glad that I gave up on the tulle because I LOVE how this turned out.

I do not have a picture tutorial, instead just some basic directions.  You can follow this post for a basic construction of the dress.  Obviously you will need to add length as the tutorial is for a shirt.  You can also follow tutorials here, here, or 
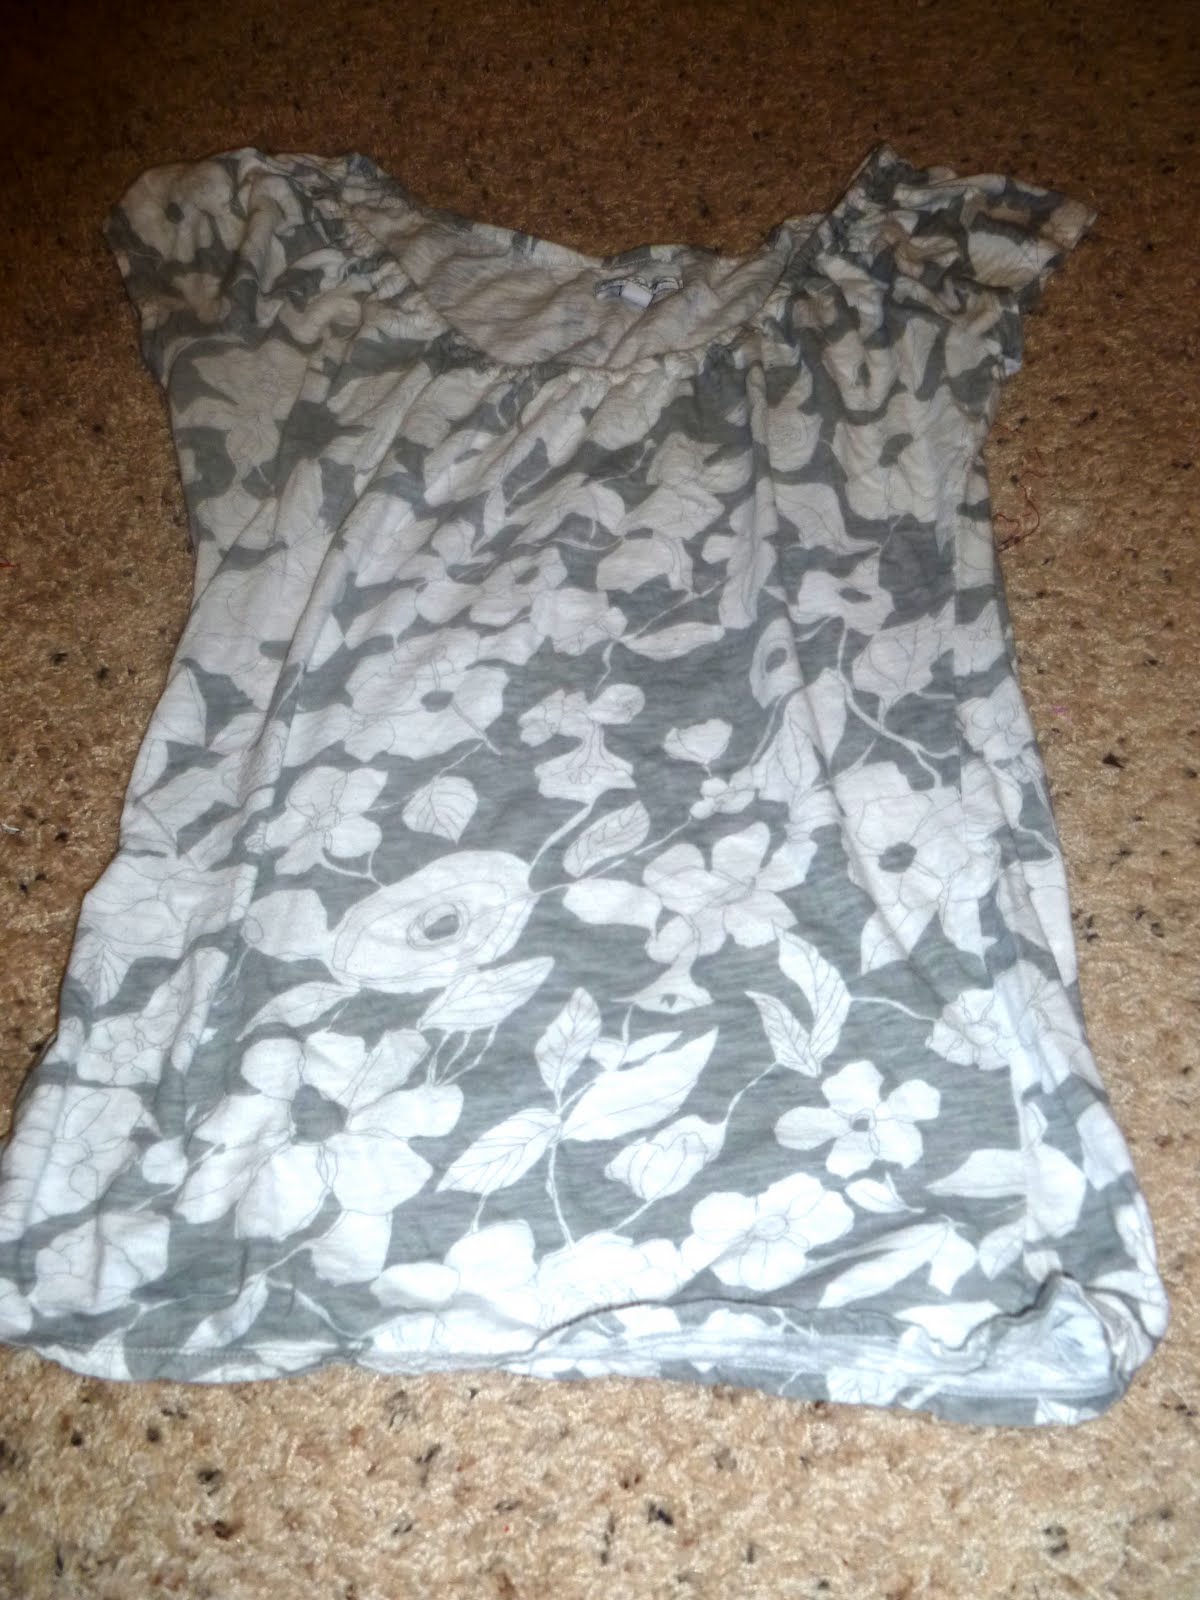
here.  Whatever one fits your fancy.  The only difference I made to the construction was on the sleeves and the neckline.  Instead of making my elastic casing right along the edge of the sleeve and neckline, I sewed a seam about a half an inch away from the edge and then made my casing.  I wanted there to be a little more of a ruffled look on the edges.  You can see the seams in the picture above.

For the pleats, I ended up doing it one way and realized later that it wasn't very efficient.  If I had thought about it ahead of time:  When sewing the front and back dress piece together, stop about three or four inches from the bottom.  Do not forget to back stitch. Cut two strips of material five inches wide and long enough to form your pleats.  Fold in half hot dog style (why yes that IS a technical term...) and iron fold.  Sew or serge the raw edges. 

Make your pleats by following this tutorial.  No point of reinventing the wheel, right?  Pin the pleats underneath the dress.  Try and make sure that your pleats are even across the dress.  Sew about a fourth an inch away from the bottom hem of the dress.  This seam will attach the pleats and give you a top stitch at the same time.  Now that you have your pleats sewn to the front and the back of your dress, finish sewing the last few inches that we left open on the sides. 

I finished the dress of by adding some flowers.  There are so many tutorials for these rolled flowers on the internet.  You can google "fabric flowers" or Make It and Love It has a few tutorials in her "No Sew" section.  I attached my flowers to a pin so that they could be removed for washing.

Love it?  Want to win one?

I will be giving away one custom made dress.  Just leave a message for the following entries:
(Remember leave ONE message for EACH entry)

1. Follow my blog.  This does not really mean anything to you, just to me. 
2. Post about the giveaway on Facebook.
3. Post about the giveaway on your blog.

The giveaway will close Sunday, September 18th at midnight.  The winner will be announced Monday.  Good luck!

Monday, September 5, 2011

Dress Revised

I took my own advice and fixed the ruffle on Tana's dress.  It just looked really funny in those photos.  I thought I could just serge the sleeves and make them smaller, but that didn't work.  I ended up taking the ruffle off of the main dress and redoing it.  Doesn't it look so much better?!?
I also made a quick trip to HL today and picked up some corduroy.  Look how it turned out!  It looks so fall-ish and comfy.  Just think of it with a long sleeved shirt underneath and a pair of boots!!

LOVE the corduroy!  I may need to go back and get some more.