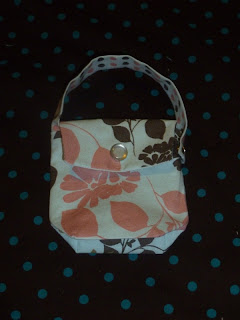
So yesterday I mentioned that I tried out Ashley's pacifier holder tutorial over on the Bernina website. As cute as hers turned out, mine did not. Don't pretend that you all didn't silently judge me when you saw this picture. It's okay... I don't blame you.
Instead of wallowing in my own pity and eating more than four chocolate chip cookies, I decided to make my own version.
I started by cutting my squares. This is one part that I found to be a ton easier. Rather than having to pin and cut all the pieces, I simply was able to use my mat and rotary cutter. Much faster!
Cut out two pieces of your outer material and two pieces of your inner material to 4 1/2" L x 4" W. Also cut one piece of your outer material and one piece of your inner material to 4" W x 2 1/2" L.
Start with your smaller flap pieces. I took the two pieces and cut an angle on the sides. You can do this however you like. I cut off a small portion so the angle was not so sharp. With right sides together sew around your flap leaving the wider side of the flap open.
Trim around the edges and remember to cut your corners at an angle so that they are pointed. You can see this example below. You can also see how I left the top unsewed. (Is that a word?)
Now take your pocket pieces. With like fabrics right sides together sew around three sides leaving one of the 4" sides open. Trim the edges.
Next you are going to box the corners. Char gives a pretty good example on this tutorial. How much you decide to take off is up to you. I took off about 1/2". After sewing across your fabric, trim off the excess material just like Char did on her tutorial.
Do this to both sides of each pocket. Both should look like this.
To make the strap I cut out a piece of material that was 2" x 8". Fold in half right sides together and iron flat. Sew two sides closed leaving one of the short sides open so that you can flip the material. Trim your edges and flip your material right side out.
Press both the strap and the flap with your iron. Make sure your corners are pointed out. I use anything that is pointy.
Take your outside pocket and turn it right side out. Pin your flap to one side and your strap to one of the side seams.
Place your outer fabric with both the flap and the strap still pinned and place it inside the other pocket which is still wrong sides out. Sew around the the sides making sure you catch the flap and the strap. Leave about an 1" to and 1 1/2" open to turn your fabrics right side out. Use Ashley's tutorial to follow the remainder of the construction.
Bonus!!! At Walmart I found these super cute pearl snaps. I used them for the front snap and used basic snaps for the sides. I think it adds something extra cute.
Watch for a new giveaway starting tomorrow!


1 comment:
I think I need like 2 of these or 3. One for a diaper bag one for the car seat (it needs a linger strap) and one for the stroller. Super cute especially with the pearl snaps
Post a Comment