Thursday, March 6, 2014

That Time I Deleted All My Photos

So, apparently when you are on your phone, and decide to look at all your photos through Google+, and you delete them from your phone to save space, it also deletes them from your blog.

Sad day.

Wednesday, March 5, 2014

Love Notes

Sometimes life happens and the plans you have change.
 
This seems to be especially true when it comes to my calling in young women's. I usually meet with my presidency once every quarter. We also have a Facebook page where we keep each other up to date on everything else. It is super convenient and I don't have to feel like we are having meetings just to have meetings. So when we do meet, we plan a ton and then divvy out who will be in charge of what activity. It works great! But sometimes life comes and throws a quick pot hole in the road and you have to be flexible.
 
I was recently in charge of an activity where I would be teaching the girls to correctly lead music and then we would make some cute scarves as a reward. It was all set. And then Savanah woke up with a fever that morning and my husband was away for training. I frantically began texting all my leaders to figure out who could take over for me that night. Sadly, none of them knew how to really lead or sew for that matter. It was obvious that we would need a Plan B. I did a quick scan of Pinterest and found an idea that I was able to modify to fit our time restraint.
 
It just so happened that this activity was the during the week of Valentine's Day. I ran out to the Dollar Store and grabbed some cute, plastic buckets and some fun ribbon. I then made a quick sticker using Picmonkey and printed them out on printable shipping label sheets.
The idea was for the girls to each decorate a bucket with the ribbon and stickers to hold their "love notes". They then used scrapbooking supplies to make several cards that they could send to people who might need a little extra love. The girls could continue to add extra cards all year long to their buckets and use them as a reminder to do small acts of kindness for others.
 
Not too bad for a Plan B!

Friday, February 21, 2014

Little Gentleman Cardigan

Sometimes it feels like every sewing project out there for babies revolves around girls. It is super easy to find a quick skirt, dress, headband, pair of leggings (I could go on) tutorial for your little girl. There are thousands. But when it comes to baby boys, it is like a deer in the headlights.
 
And then one day, the heavens opened up, and I found this.
 Cutest thing EVER!
 
Naturally I had to make one immediately. I rummaged through what I already had for the baby and got to work. So essentially this project could be considered free if you already have the stuff. If not, it is still really inexpensive.
 
I think this last one is my favorite. The combination of nautical and a teeny tiny onesie make it irresistible! Now I just need this little man to come so we can play dress up.

Sunday, February 16, 2014

Quick & Easy Burp Cloth

I think you hit a certain point in your life when you look at your Facebook feed and at least 20 of yours friends are expecting. And it will stay that way for years and years to come! If you are like me, then you are probably always looking for a little something extra to add to all those baby shower gifts.
 
Buying clothes, toys, and other baby gear is fun, but I think there is something special about adding a homemade gift. I especially like to add something that is better quality than what you can buy. You know, homemade blankets that are actually big enough for the baby to use after their first month, or towels that actually absorb the water. Novel thoughts, right?
 
My babies have major acid reflux. No, not the "oops, looks like you got a little white stuff on your shirt" type of spitting up, but the "5 gallons of milk just came back up all over you, the baby, the baby carrier, and the diaper bag at church and there is definitely no salvaging this" type of spitting up. It is awesome...
 
Needless to say we go through a lot of burp cloths. And with two previous spitters, I can say with confidence that not all burp cloths are created equal.
 
So, what's my favorite homemade gift to add?
 Burp cloths!
 
Here's what you need:
Gerber cloth diapers
Ribbon
Coordinating thread
Sewing machine
 
You essentially could just dye the white burp cloths and call it good if you don't happen to sew. I think a rainbow of colors would be an awesome baby shower gift. I just really do not like dying things. Truth, I'm not good at it.
 
Cut your ribbon to about an inch longer than the length of the burp cloth. Pin your ribbon down on top of the two seams that are on the burp cloth. I tucked the two ends of the ribbon under so there would be no raw edges before I started sewing
Now switch your machine to a tight zig zag stitch and sew along both sides of the ribbon. This takes a little time, because the stitch is so tight, but it looks really nice when finished.
 
And just a quick side note, I left my bobbin white so that it would blend in with the underside of the burp cloth. But that's just my preference.

Tuesday, February 11, 2014

Purpose of Life Handout

As I mentioned in a previous post, we are expecting! Yea for babies, right? But I have definitely not been feeling "yea" with this pregnancy. It started with the "sickies" and then went straight to the "no energy to post anything". I have been crafting up a storm, but just have not gotten around to posting about them. That all changes today. I guess I am blog nesting.
 
I have been serving as our church's Young Women's president for a little over a year now. I absolutely LOVE the program and being with the girls. It is quite a nice change of pace from being with elementary school kids all the time. The new curriculum that was introduced in 2013 is awesome. I love the extra leniency when I am planning a lesson. And I really love finding cute things for the girls to add to their journals (more on those later!).
 
This month's theme is the Plan of Salvation. I taught a quick lesson on the plan and then switched to the purpose of life. I was really struggling to find a cute handout for the end of my lesson, and Sugar Doodle was down all last week. What?
 
I finally stumbled across this handout on Pinterest. 
I love President Utchdorf, so it was perfect! I then remembered seeing these little hamburgers all over Pinterest and thought they would be so cute to give out along side my handout. 
They are so adorable and come together in absolutely no time at all.
 
Quick directions:
1. Mix a few drops of green food coloring into a small bag of coconut. Shake well.
2. In three separate bowls, mix frosting with red, yellow, and green food coloring. I used butter cream frosting from a container.
3. Smear red and yellow frosting to flat side of vanilla wafer.
4. Place York peppermint patty on top of frosting.
5. Smear green frosting on top of peppermint patty.
6. Push a bit of coconut onto green frosting.
7. Smear more green frosting to the flat side of another vanilla wafer and top off your burger.
 
Now make about 50 because they are so easy and they look so darn cute all lined up together!

Friday, October 25, 2013

DIY Coming Home Outfit

Back in August, my sister-in-law sent me a pin on Pinterest asking me if I could make this outfit from an Etsy shop. Knowing that I could totally replicate it, and that I definitely could do it for way less than $24, I told her yes.
I kept some things the same, but added my own style, too.
 
I chose a lighter grey chevron and a dark pink onesie. Did you know that Hobby Lobby sells onesies for like $3.99 and then you can use a 40% off on top of that?  I also chose to have my bow tie go all the way around the onesie rather than just at the front. I like that it hides where the onesie and the material meet. And finally I found a giant rose for pretty cheap at Hobby Lobby and added that right to the center of the bow.
Cost breakdown:
Onesie: $2.40
Chevron material: already had, but let's say $1.50
Black material: $0.40
Flower: $1.80
Total: $6.10
 
 
That is quite a savings by doing it yourself, or finding a generous family member to do it for you! ;)
 
So the next time you find something super cute on Etsy, pause before hitting the "purchase" button and find out if you can do it yourself.

Wednesday, October 23, 2013

Picmonkey Handouts

 
If you haven't tried Picmonkey yet, you totally need to. I use it all the time to edit photos and create fun handouts for my YW. You can totally pay for the complete version, but I find the free version suits all my needs just fine.
 
I created this cute handout to go with one of my lessons. The great thing is that it is totally interchangeable. Just swap out virtue for whatever other word you want.
 
To create this handout, I googled "water" under images and found one I liked. Save the image to your computer. Open the image on the Picmonkey website and click the add text button. I found a "creepy-ish" looking free font and began adding my text. Once I had it the way I wanted it, I changed the blend modes from normal to overlay to give it that see through look. 
 
The best part was finding Bruce (the shark from Finding Nemo) Pez dispensers on clearance to attach the handout to. They turned out adorable and the girls loved them.


Monday, October 21, 2013

Potato Soup

 
The BEST Potato Soup
 
Bacon (lots!) cut into pieces
5-6 large russet potatoes
1/2 medium white onion
2 cans chicken broth
1 5oz can evaporated milk 
2 T flour
Salt & Pepper
Shredded cheddar cheese
 
 
1. Heat a large pot over medium heat and cook bacon until crispy. Remove bacon from pot and set aside, leaving the bacon grease.
 
2. While bacon is cooking, peel and cut potatoes and onion into small pieces. Since I am not a terribly big fan of large chunks of onion, I cut mine pretty tiny.
 
3. Add potatoes and onion to the bacon grease. Cook until potatoes turn translucent.
 
4. Add both cans of chicken broth and cook on medium high, stirring occasionally. Simmer soup until potatoes are tender.
 
5. While soup is simmering, pour evaporated milk into bowl and add flour. Mix well, until flour is completely incorporated.
 
6. Once potatoes are soft, add milk/flour mixture. Lower heat to medium and let simmer for ten minutes.
 
7. Serve hot with shredded cheese and bacon pieces.


Monday, September 30, 2013

Life is Full of Surprises

Oh yes... we will be adding another Tinsley to our family in May.
 
To say that we were shocked would be quite the understatement. Especially since we were taking the necessary precautions! I had a few symptoms but didn't think much of it since I am "getting older" as my mother likes to point out. The symptoms increased and then a few others announced themselves, so I bit the bullet and bought a test.
 
I still waited a couple days, probably in denial. Finally, one Sunday afternoon after waking up from a nap, I knew I couldn't put it off any longer. Those two pink lines popped up faster then I expected and for a brief moment I am pretty sure I had a small heart attack.
 
I haven't had a baby in five years. FIVE YEARS! Not to mention that we got rid of most of our baby stuff. We thought we were done... we thought wrong.
I'm pretty sure I made this same face when the test read positive!
 
We have had several weeks to adjust to the news and it is sinking in. I am also surrounded by amazing friends and family that are ready with whatever baby supplies I need. And I have about seven months to mourn my craft room before the new little arrives.
To surprise the grandparents I made Savanah a quick shirt using my Cricut. I cut the vinyl out to use as a stencil and filled in the letters with fabric paint and some glitter.

Don't have a Cricut, no worries, freezer paper and an exacto knife work awesome!

Tuesday, September 24, 2013

Pottery Barn Gear for Cheap

I love Pottery Barn. We definitely cannot afford it, but my mother in law has bought the kids several awesome things from there and I just love the quality. One of my favorites was when she bought the kids luggage with their initials. They look so cute rolling their personalized luggage through the airport.
 
While visiting Utah this summer I made sure to hit up Downeast the check out their PB stock. They sell it at a discount because it is either damaged or has been personalized. Most of the names are odd. Like REALLY odd, but they have some awesome stuff for cheap. And occasionally you can find a name of someone you actually know. Score!
 
The day we went they happened to be doing an extra 30% off their gear. This alone would have been awesome, but on top of that the stuff was way clearanced already.
I grabbed several backpacks, like the one above, for under $2. I also grabbed lunch boxes, water bottles, and little make-up bags. I didn't want to miss anything. Especially when these backpacks still sell for a ridiculous amount.
 
I tried to grab the ones with the shortest names so that they would be easier to cover. Then I got to work finding the perfect patches. Landon's proved to be a little difficult, as I had to go to the Internet to find it. A quick ship from London and we were in business.
I opted for the iron on version because obviously anyone can do it. I figure if we have issues later, I can sew it then.
 
Not too bad for a seven dollar Pottery Barn backpack. Sadly, yes, the patch was more then double the actual backpack. :(
 
So if you live near a Downeast, seriously go check it out. You won't be disappointed.

Tuesday, September 17, 2013

Simple Nail Polish Handout

I have mentioned before that I teach the 12-18 year old girls at church. We decided to divide our teaching responsibilities into months instead of weeks this year. That way we get all our teaching done at one time and don't have to worry about it for another three months.
 
Since September is one of my months, I am currently in full swing. The first week of the month is always a fast Sunday in the LDS church, and so handing out treats would be torture for everyone! I try to come up with something that isn't edible.
 
While at Joann's I came across a three pack of little nail polishes for only 50 cents. I snatched up all they had and knew I could do something with them. 
 
It didn't take long for something to pop into my head and with the help of picmonkey I got to work.
The best part is that you could easily change out the "testimony of fasting and tithing" part for anything else.
 
Simple and cute. And what girl wouldn't love a new nail polish?

Friday, August 16, 2013

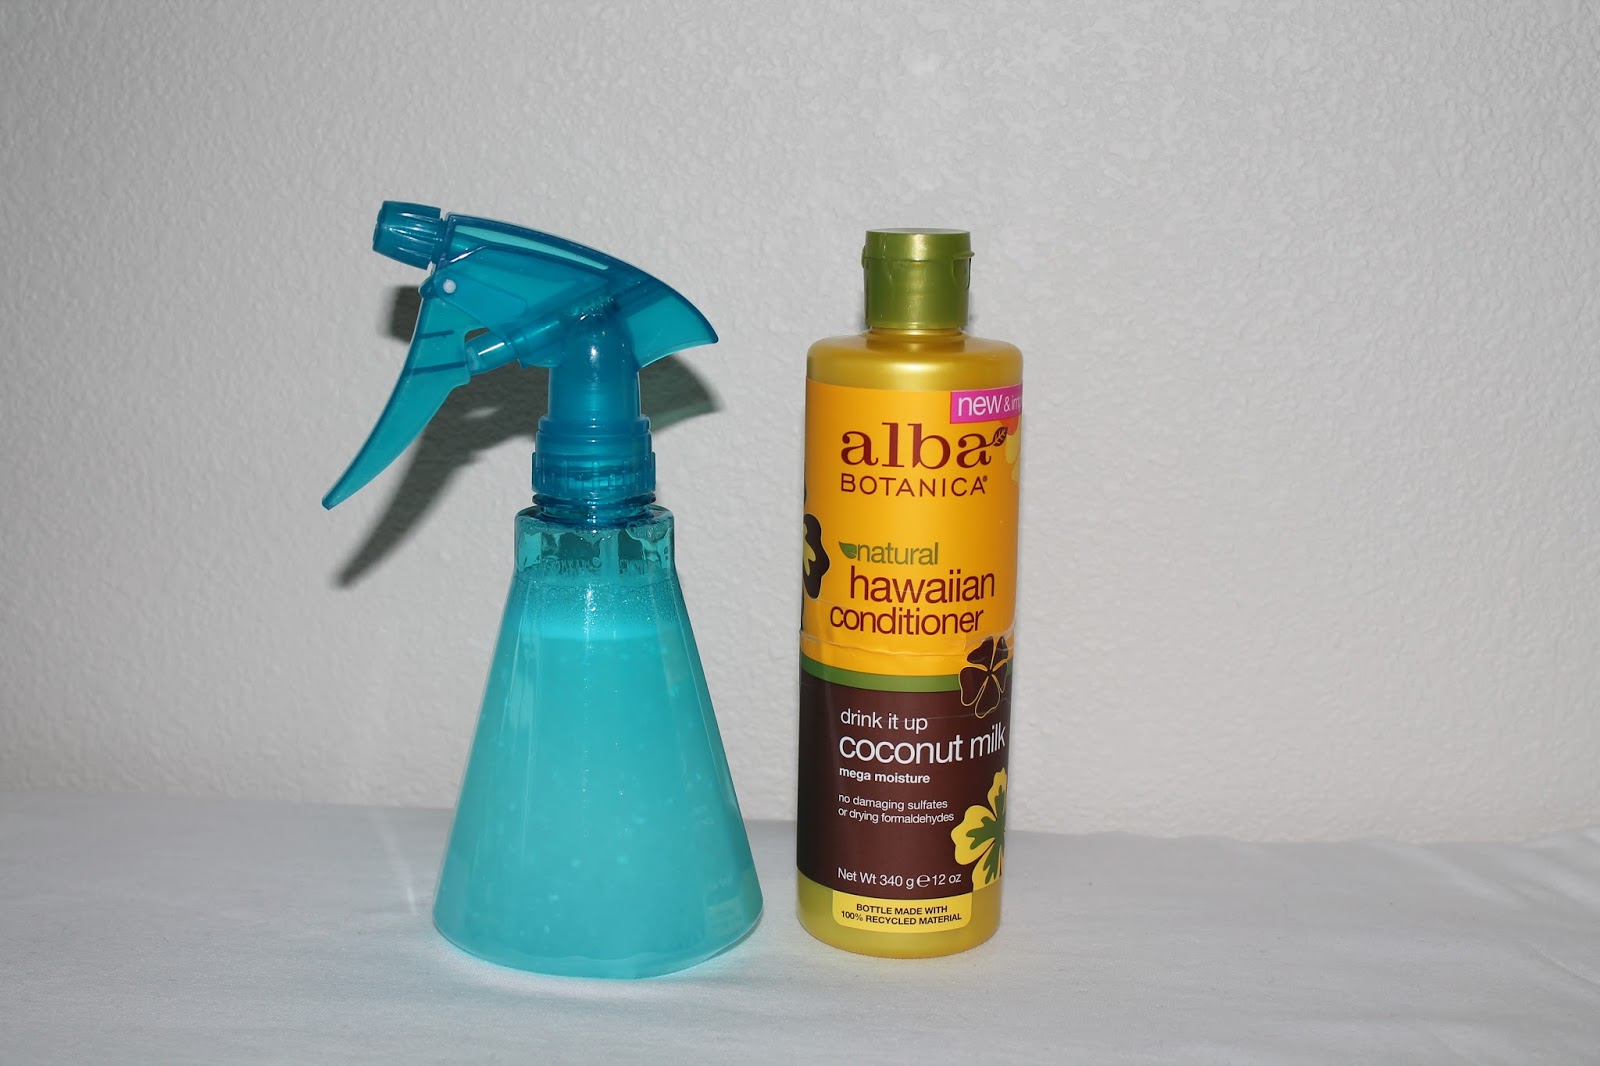
Homemade Detangler

This might not be new to some of you, but this idea just popped into my head the other day.
 
My daughter has a ton of hair. And we live in windy Wyoming, which means we deal with a lot of tangles. The store bought stuff can be pretty cheap but trying to find one that has a nice smell and doesn't leave a build up can be tough. I guess I jut dealt with buying the stuff from the store that it didn't dawn on me to try to make my own.
 
On one particularly tangly day last week I thought about putting a small drop of conditioner in my daughter's hair to try to help. That was when I came up with this solution.
 
Take any empty spray bottle (you can buy one from the Dollar Tree or use one from home) and add about three squirts of your favorite conditioner. I used what was left of my organic coconut conditioner. This is especially great if you are concerned about unknown toxins. Now fill the bottle with hot water, leaving about an inch at the top and shake. The hot water helps break the conditioner down and allows it to mix with the water.
 
We have been using this for about a week and love it! The smell is amazing and it works wonders on tangles.

Thursday, July 4, 2013

Monday, June 3, 2013

Surprise Homecoming

One of my good friend's husband was deployed for the past year. When the date was finally set for him to come home, we made some big plans. Another friend and I snuck in while they were down at the airport and put our creative juices to work. We wanted to show our support and love for their family and I think we nailed it!
We started by decorating the outside, all while grey clouds began to inch their way closer and closer. We used a ton of yellow ribbon and had some of the girls from church make signs. I know my you can't read them but my personal favorite (maybe because I made it... just maybe...) is the one that reads "Are you free next Saturday?". We LOVE some How I Met Your Mother!
Inside we decorated with balloons and flag banners. My friend also had the brilliant idea of heart attacking their house. We had everyone at church write a note to Tyler and the family. Even the little kids. We got some pretty cute notes from the little ones.
We also left dinner, flowers, and decorated their bedroom. I totally forgot to take a picture of that! Picture sparkling cider, champagne glasses, candy all over the bed, balloons, and some fun decorations.
It really was so fun surprising their family! We are so thankful for them and especially everything they have sacrificed this past year.

Wednesday, May 22, 2013

Maxi Mayhem

I seriously can't stop making these! I made five for a friend and three for me so far, not including the pint sized ones I have made. And I have fabric for five more! Can you have too many maxi skirts? Please say no...
 
Seriously head over and start making your own. You will not be sorry!

Friday, May 10, 2013

Baptism Invites

Or any other type of invite for that matter.
 
I had one of my awesome friends snap a few pictures on Easter. Making sure to off-center the picture so there was room for some text. Once I picked the perfect picture, I added the words with Picmonkey. If you haven't tried that site, you must! Most of it is free with a few upgrades if you want to pay for it. After adding the words I faded them a little into the brick wall. Then a quick print at Sam's Club and they are ready to be sent out.
 
So excited for these invites, and more importantly, this day!


Thursday, May 9, 2013

Maxi Skirt Tutorial

Once I realized how ridiculously simple these skirts were to make, I have been whipping them out like crazy!
This tutorial is really simple, so don't try to over think it. Also, it involves some basic addition, so bust out those calculators if you need them!

1. Cut your waist band pieces. You will need two rectangles that stretch across your hips. To find the size measure around your hips. For example: my measurement was 33". Then subtract 2" from that number.  For the "height" the basic measurements call for a 16" piece. That way when it is folded and sewn it is 8" and then essentially folded again over itself when you wear it, it is 4". I cut this a little short because I have a shorter torso.

2. Cut you main pieces. You will need two of these again with the stretch going across your body. This is where you need to do some math. To find the width of the top of the skirt, take your band measurement and add eight inches. Then find a bottom measurement by just cutting your piece at an a-line until you hit the edge of the fabric.
Example:
My hips are 33"
33"-2"= 31"
31"/2= 15 1/2" (Divided by two for the front and back panel)
My waistband was 15 1/2"x15"
31 + 8= 39"
My fabric width was 56"
Once you have these numbers you need to place your fabric right sides together and then fold the material hot dog style again. This will make it where you only make one cut. But doing this means you need to divide your two numbers in into fourths. So, in my case, 39/4=9.75" and 56/4=14".


Yeah... you totally can't read what that says. The drawing points out the line that you make from the top measurement (9.75") and the bottom measurement (14"). You are angling the line out from the smaller number to the larger number. Cut along this line, leaving you with two a-line pieces.

3. Serge, serge,  serge. If you don't have a serger, you can use a zig-zag stitch on your machine. Sew your two main pieces of fabric, right sides together, down the sides. Also sew your two waist band piece together along the tall sides.

4. At this point try on your waist band piece to make sure it fits. If it is too big, meaning you have a lot of stretch in your fabric, cut it smaller little by little. Once you are satisfied with your waist band, continue!

5. Fold your waist band piece over, wrong sides together, and line up the raw edges. Flip your main skirt piece so right sides are facing out. Now place your waist band around the main skirt piece and line up ALL the raw edges. Line up the side seams and pin into place.

5. As you sew/serge, pull JUST the waist band piece. You are pulling on the waist band to stretch it to the same width as the main fabric. Just stretch and sew/serge.

6. After your two pieces are sewn together, iron all your seams. This will snap your fabric right back down to size. Make sure to use lots of steam!

7. Now try on your skirt and cut any excess material from the bottom. No need to hem this stuff, it will just kind of roll over on itself anyway.

Now, about the pink skirt pictured, it is obviously not the same type of skirt. I did several alterations to this skirt because I cut the material wrong and wanted to add a fun ruffle to the bottom. This just shows how you can dress up and add things to this simple tutorial.

Enjoy!

***My awesome friend did a quick photo shoot for my facebook page!


crafterhours

Thursday, May 2, 2013

Fixing a Too Long Shirt

I have a ridiculously short torso. Like REALLY short. Combine that with a larger chest and some shirts can make me look really wide. I try to buy longer shirts but sometimes that doesn't work out very well either.
I bought this shirt at Downeast a couple years ago and have truly never worn it. It is awkward long and flow-y. Not a good combination. But it is also so dang soft and comfy that I just couldn't get rid of it. I knew I needed to fix it, mainly because I have the perfect yellow skirt to wear it with. 
I started by cutting off about five inches from the bottom. I would have cut a little less but there was a tiny hole in the shirt.
Take the bottom section and cut some of the width so that it is more fitted. Then fold it in half, wrong sides together. You are going to be making a band for the bottom of the shirt.

Slip the band around the outside of the shirt (facing right sides together) and pin the side seams so they line up. Now, my shirt piece was a little wider than the band, so slightly stretch the band as you go to match it up with the shirt. Serge/sew the two pieces together and iron. 
Now I have a shorter, more fitted shirt that is still SUPER comfy and soft.

Wednesday, May 1, 2013

Mason Jar Pin Cushion

I whipped up this cute little mason jar pin cushion the other night. I happen to have a bunch of mason jars from my husband's boss right now, so I am in mason jar heaven!
 
I pinned this on Pinterest the other day and thought the overall idea was really cute.
On small change I made was instead of adding thread and other notions to the jar, I added the extra pins. Good storage!

Tuesday, April 30, 2013

Itty Bitty Maxi

We finally made it. Wyoming finally had some Spring like weather! Don't worry, though, it is suppose to snow tomorrow.
 
I ordered some knit off of fabric.com a couple weeks ago and couldn't wait to test out some cute little maxi skirts. I figured it would be easier to test one on her before I attempt one for myself.

Super comfy and super cute! Tutorial coming later this week!