Tuesday, June 21, 2011

Men's Shirt Skirt

Wow! It's been awhile. Between the end of the school year, our trip to Utah, and sewing for other people I have been pretty busy. I did manage to find some time to make a few things for the blog, but just not a lot of time to post about them.

There are so many things you can do with a men's shirt.  If you look on most any blog you will probably find a tutorial for a dress, but I wanted to try something different.  Shawn has quite a few dress shirts from his Wells Fargo days that he doesn't wear anymore.  Usually I am the type to just get rid of things, but I held onto a few of them.
 This is the shirt I started with.  I laid it out as evenly as possible, so that I could cut through both the front and the back at the same time.
 I cut the shirt as close to the top as possible so that I can use the bottom of the shirt for another project.  I didn't measure the width of the skirt I just cut as much as a could.  For the length of the skirt I just measured how long I wanted it to be on Savanah.
 Take the two pieces of the skirt and place them right sides together.  Sew (or in my case SERGE!!!) the two shorter ends together.  This will create your tube.  I quickly hemmed the bottom of the skirt before moving onto the top.
I had one button that was in the way at the top of the skirt, so I ripped that baby right off.
 Next, I created a waistband for the top of my skirt.  I did this by cutting the sleeves.  I decided how thick I wanted the waistband and cut my pieces.  Your two pieces should be just as long as your main skirt tube. 
 Take your two waistband pieces and sew the short ends together, creating another tube.  Fold the tube in half with the wrong sides together and iron flat.  This will give you a finished edge at the top of the skirt. 

Apparently I struggle and didn't take pictures of the next step.  You will place the main skirt tube (turned the right way) inside the waistband tube.  The raw edges should line up at the top.  Sew the two pieces together.
 Iron the waistband and main skirt so that the seams are pressed.  It should look like the picture above.  To finish it off I sewed a top seam close to the edge.
 Now, if anyone can come teach me how to make a button hole that would be great, but until then... I ripped two holes through the top layer of the waistband, making sure that they were fairly even. 
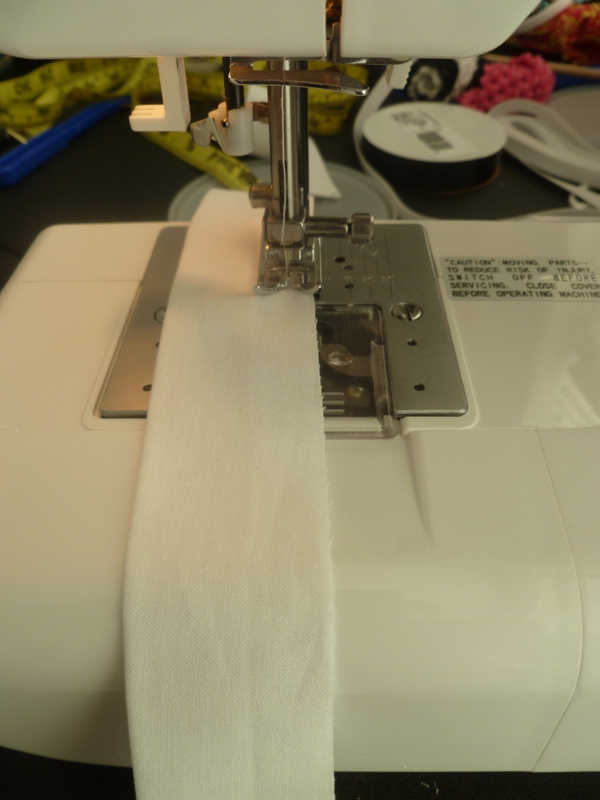
 I rummaged through my ribbon stash but couldn't find anything I liked to go with the skirt.  Instead I used a piece of white material to make a tie.  Cut two pieces of material at about 3" wide.  The length doesn't really matter, as you will cut them down later.  Fold the pieces in half  hot dog style and iron flat.  Sew across one short in and down the entire length of the material.  Make sure to leave the bottom end open so that you can turn your piece.  Turn your two pieces right side out and iron flat.  This is where I figured out how long I needed my ties to be.  I trimmed both pieces down a couple inches.
I then measured a piece of elastic that was about three inches smaller than Savanah's waist and began pulling it through one of the holes.  With one end of the elastic still sticking out, sew the unfinished edge of the tie to the end of the elastic.  Make sure to use a zig-zag stitch!  Now pull the elastic all the way through the casing until it comes out the other side.  Sew the other tie to this end of the elastic.  You will want to pull the elastic into the casing so that the sewed edges are tucked in.
Because the openings are raw edges I tucked the edge under and sewed a straight line down .  This will not only clean up the edge, but also keep your elastic and ties in place.
Tie the two ends together and you are done!  Think how cute this could be in stripes.  The best part is that it was absolutely free!  I already had everything on hand.


Sunday, May 29, 2011

A New Take

One great thing about finding an easy pattern is that you can adjust it.  When I started making the Peasant Top I couldn't stop thinking about other ways to alter it.  This is my newest creation.  Everything about this top is pretty much the same.  Follow the original tutorial until it is time to sew up the sides.
Either use the same material as you did for the main shirt, or find a coordinating fabric like I did.  Cut two strips of fabric at about 2 1/2" wide by whatever length you feel necessary.

Fold your pieces in half right sides together and iron them flat.

Sew the strips closed leaving one end open.
I always trim my edges down a bit so that it lays nicer.  Then flip your tubes.  I definitely would purchase a kit to do this, otherwise it can be a real beast!  Iron your piece flat.
Now it is time to decide where you want to place your strips.  I chose about 3" down from the arm pit.  Your main piece should still be right sides together.  My strips were quite a bit long so I had pull some extra fabric through.  The finished edge of your strips should be inside the shirt.  The piece you can see in the picture is the raw edge that I will cut off after.  Pin your strip into place and sew up the sides.  Do this to both sides making sure that they are even.
Finish the shirt exactly like the rest of the pattern.  When you finish this is what the back of the shirt should look like.  I made this shirt a tad wider because I knew it would be pulled back by the ties.  And a quick shout out to Walmart (we have been on a little better terms lately) for all the fabric I have found there lately.  The yellow fabric above... $0.75!

Friday, May 27, 2011

Shopping on a Budget

Since leaving Utah, Shawn and I have obviously gone from two incomes down to one. It used to be that I could go and buy things we needed (within reason of course!) and not really worry about it. With summer coming and not really having the extra money to support Tana's wardrobe I have been spending a lot of time trying to make the most of our money. I have to say that I think I have been doing pretty good, too. It also helps that there is NOWHERE to shop in Cheyenne!
We ran to Walmart today to pick out a present for Landon's new BFF.  I decided to quickly look through the toddler's section.  Sadly, there was nothing, but I noticed a ton of $1 and $2 signs in the older girl's.  While looking through what they had, and hating that they didn't come smaller than a 4, I decided to grab just a couple shirts and see if I could do something to them.  And at $1 a piece I figured I could buy a few and not worry too much about it.
I started by cutting off about half of the sleeves.  I wanted the sleeves to hit at about the elbow.
I had a couple ideas for the sleeves, but this one won out because of convenience.  I folded the raw edge of the sleeve under, pressed it with the iron, and then added a few pins.
 To make sure that my sleeves would end up the same length I folded the shirt in half, lined up the shoulder seams, and then lined up the bottom of the sleeves.  This way I could know exactly where to fold the second sleeve.
I stitched the sleeve closed by lining up the edge of the sleeve with the foot.

I wanted to add a double stitched edge because that is what is along the bottom of the shirt, so I lined up the first stitch to the edge of the foot and sewed around again.
To create the elastic bottom I cut out a scrap piece of fabric.  My piece was about 1.5" wide and just the length of the material I had.  Do make sure that the material will go all the way around your shirt.  You are creating a casing for your elastic to go into to.
Take the scrap piece and fold over both edges about 1/4" and iron down.  This way you will not have any raw edges showing.

Turn your shirt inside out and decide where you want to add your elastic.  Pin your casing into place with the raw edges turned in towards the shirt.  Pin around the entire shirt.
I started with the bottom seam because it was a lot easier to follow the bottom seam that was already there.  Sew around the entire piece of material.
Next, start sewing the top of the material closed, but this time do not close the seam shut.  Leave about an inch opening to add your elastic.
Cut your piece of elastic to about 1/2" larger then where it will hit your child.  Thread the elastic through the casing.
Sew the two pieces together making sure that they are facing the correct way.  Trust me on this!  I have sewed them twisted before.  Also make sure that you sew through elastic with a zig-zag stitch.  Trust me on that one, too!!
Once you have the elastic in the casing, sew it shut.
Flip your shirt right side out and admire your work.  Now I just need to try it on the little diva!  Adding the elastic makes any shirt that would normally be too big, fit quite a bit better.

Sunday, May 22, 2011

New Favorite Shirt


I have been on quite the sewing kick lately.  I have also been scouring the internet for shirt patterns.  It seems like I find a million skirts, but shirts are a little harder to come by.  I did find this tutorial and adjusted it to a shirt.  I figure you could do that to a lot of dress patterns. 
The great thing is that they are pretty easy and really cheap.  For the top shirt I made my own bias tape, but for the bottom shirt I used the packaged tape.  Making your own bias tape can be a little time consuming, but I plan on heading out to Hobby Lobby this week and buying one of the bias tape tools that I have seen.

I did improvise on one part.  It said to sew the bias tape shut but my machine was not liking the idea.  I was having an extremely hard time maneuvering the small piece of material through my machine.  Instead I sewed the bias tape to the shirt up until the top of the bodice and stopped there.  To close the remainder of the bias tape I used Heat and Bond.  Worked like a charm!

Tuesday, May 17, 2011

Peasant Top

Holy Hannah!  I have been trying to upload this blog post for almost a week now, but Blogger has been struggling.  But to much perseverance I have prevailed!!
Summer is coming (well... not really...) and Savanah's summer wardrobe is pretty sparse.  I am still enrolled in SA (Skirtaholics Anonymous) and have been making great progress, so I have been trying my hand at some tops instead.  This peasant looking top is so easy and you can change it up a ton.  I have made several already in different variations.  Savanah is in 2T clothing, so this is made to fit her.  You would obviously need to adjust the sizing for your child.  I began by cutting two pieces of fabric 14" wide by 16" long for the main bodice.  I then cut two pieces 6" wide by 12" long for the arms.
A quick tip: I always struggled making arm holes for shirts.  I would look at other tutorials that would say "go over two inches and down six inches and cut it in a J shape" and blah blah blah...  It NEVER worked for me.  Enter my brilliant idea that I am sure most of you have already figured out.  I took one of Savanah's tank tops and traced the shape.  Like DUH!!!  It makes the process a million times easier.
Take your two bodice pieces and line them up wrong sides together.  Then fold them in half hot dog style.  This way you can cut all of the arm holes at once.
 With the arm pieces line them up the same, wrong sides together, and fold in half lining up the short ends.  If this doesn't make sense, basically you are lining up the two sides that are 6" long.  Again, cut of the arm holes.  I accidentally took this picture the wrong way, but whatever.
Take one of the bodice pieces and one of the arm pieces and line them up with right sides together, and pin around the arm hole.  Sew from the top of the arm hole to the bottom. 
Take your other arm piece and sew it to the other side of your bodice piece.  When you have them both sewn on it should look like this.
Now take your other bodice piece and line up the arm holes again.  If you look at the picture above you will see when I have the two sides pinned.   
Once you have the final two sides sewn you piece should look like this.  You can see where the bodice and the arm pieces are sewn together on this side. 
 Next, line up the sides on the shirt.  I began by lining up the seem of the armpit so that it was even.  Sew up the side and the small edge of the sleeve.  You can see that there is only about 1" of the sleeve that needs to be sewn, up in the top right corner of the shirt.
 Once both sides are sewn you will want to hem to bottom.  I chose to make the hem a little larger.  I folded the bottom 1/4" and ironed it flat.  This way my edges would look finished.  Then I folded the bottom about another inch to make the final hem. 
 Sew the hem closed near the top of the fold.
 Now onto the arms.  Again, I folded the material 1/4" to hide the raw edges.  Then fold your edge about another 1/4" to create the final hem.  Sew into place.  This was a little tricky because the arm holes are a little small.  Go slow!
To finish the top, you are going to want to make a basic casing. 
 I made my casing about an inch wide.  I did this because I wanted to have a piece at the top that looked a little more finished.
 After folding, and ironing, I sewed a straight line across the entire top of the shirt about the width of my sewing foot.
 Then I measured down to a little more then how wide my elastic was.  I am pretty sure I used 1/2" elastic.  Sew another seam below the top seam, but leave a large enough space to thread your elastic through.  Also, don't forget to back stitch!
 Cut your elastic to about 1" larger then your child's chest size.  Thread your elastic through and admire my beautiful manicure!
 Sew the two pieces of elastic together using a zig-zag stitch.  This is very important and I just figured it out!
Sew the hole closed and admire your new top!