Tuesday, August 23, 2011

Noggin Covers

A friend of mine just had her first baby girl.  I remembered that Ashley made some really cute newborn hats out of knit.  Her fabric was to die for!  Her knit was quite a bit more spendy then I like, but it was extremely cute.  I found mine at HL. 

When I bought the knit I had envisioned using it to make a few circle skirts for Tana, but it didn't end up being wide enough.  I just couldn't let this cute fabric go to waste.  I am a SUCKER for zebra print.  Especially on a sweet baby girl. 

I stuck pretty close to the tutorial, except my band and hat pieces did not line up so I had to trim some off before sewing the two pieces together.  I also did not make my flower out of knit.  I used broadcloth because it is super cheap.  And I did not attach the flower directly to the hat.  I glued the flower to a pin so that it can be removed.
And since making these hats has made me realize how much I miss my little babies, I found a video of little Tana.  Such a pretty little girl, packed with a whole lot of tude!

I have no idea who the crazy lady talking in the video is.  I must have been picking up someone else's frequency when I shot this.  Please just ignore the voice.  Really... ignore it!

Thursday, August 18, 2011

Now I Know My ABCs


Before we left Utah I happened into a consignment store to check out the cool, vintage merchandise. I found a few small things I liked and was about to check out when something caught my eye. Next to the counter was an old cupboard door. It was this awful off white color with streaky paint, and the middle sections were painted unevenly with chalkboard paint. But I knew it had potential.

The bad part: I have a VERY strong disliking for chalkboard. VERY STRONG!
The good part: The middle sections popped right out by unscrewing sections of the back.

I sanded everything down, spray painted the frame red, distressed, and inked. Now I had to figure out what to do with the middle sections. My first "brilliant" idea was to spray paint the existing wood pieces with magnetic spray paint. I headed out to HL, spent almost $11 on the can, came home, and got down to business. After meticulously following the directions and reading about it online I used the entire can and... NOTHING! It had very little magneticity (not a word?).  

At first I was pretty devastated, and then a little pissed off. Instead I opted for sheets of metal. It took a while to find what I wanted, at the price I wanted it for, but I prevailed. I had the sheet cut to the measurements I needed and glued them right to the back of the frame.
Lastly, I found some rope at HL sold by the yard. I drilled two holes in the top of the cupboard and strung the rope through. A simple knot at the end of each side of the rope and I had the perfect way to hang it.
The Diva loves "playing letters" and Landon uses it to spell and sound out words. Win win!


Tip Junkie handmade projects


Tuesday, August 16, 2011

Vintage Chic

Yeah, I know.  I have been gone a L   O   N   G time, but we hit up the Gma's and Gpa's house before school starts and I didn't really want to advertise that we were going to be gone an entire month.  But, I am back and have a laundry list of ideas to share with you guys.  Also, my MIL bought me a hand sander!  No more trying to borrow one or mutilating my hands with regular sand paper.

While in Washington, my SIL dropped in for a quick visit.  On Sunday she walked out of her room wearing a nice skirt with a super cute slip hanging out (purposefully, I should add!).  She mentioned that she got said slip at either Anthro or Urban.  I didn't want to ask how much she paid for it.  All day I thought about how I could duplicate it.  Just thinking of all the possibilities in styles and colors.  Ever had a skirt that just wasn't long enough.  Problem solved!

I started with basic broadcloth.  I talked to my mom about my idea and she suggested the broadcloth.  I originally was going to use satin but realized it would be a lot more difficult to sew with.  I cut my piece of broad cloth to my measurements.  I measured from my waist to just above my knee.  This is the length.  I didn't measure around my waist, I just made sure that it would wrap around with about six inches of extra material.  If you want your slip to end up fuller, add more than six inches to your width.
Sew/serge the two short sides together to create a tube.

To prevent fraying I serged the top and bottom edges.
Now you want to create a casing for the elastic waist.  I bought non-roll elastic so that it would not roll around when I pulled the slip on and off.  You could use any size, but I chose 1/2".

Fold your edge over and iron, making sure it is big enough to fit your elastic.  Sew around the entire tube leaving a small opening to thread your elastic through.  Cut your elastic to your waist measurement minus about an inch.  Thread your elastic through the opening and sew the two sides together with a zig zag stitch.  Sew the small opening closed.  If you are not familiar with this process google "elastic casing".
I purchased two yards of lace from HL.  The nice thing is that they have a pretty good variety of lace by the yard.  I also figure that you could dye the lace to make it any color you want.  The lace I was drawn to was of course one of the most expensive ones, but with my 40% off it made it not so bad.  I serged the raw end of my lace to make it easier to deal with later.  It also caused the lace to gather.  
Pin the serged edge of your slip to the serged edge of your lace.  Make sure that the right side of the lace is facing out.
Carefully sew around the entire width of the skirt.  Make sure you are catching both the slip and the lace.  I went extremely slow!
Once I got to the back of the skirt I left a small opening.  Flip your skirt inside out and bring the two ends of the lace together.  You should have excess amounts of lace.  Sew down the lace to create a tube.  You want to get the lace as close to the same size as the slip.  After I sewed the lace together, I serged the raw ends closed.  Then I flipped the skirt back the right way and sewed the small hole closed.
Your final product should look like this.  Nice, simple slip with a cute touch of lace.  Pretty excited to see how it looks under a skirt!
Enjoy!!

Monday, July 18, 2011

Action Shot!

Here is a picture of my "new" jean shorts in action. 

Please ignore the small child that would not leave me alone, the beautiful hotel carpet and mirror, and the fact that it looks like my toenails are glowing!

Saturday, July 16, 2011

Jeans Pants into Shorts

I have a few pairs of jean shorts that have gotten way too big, leaving me almost shortless this summer.  Not cool!  I have been on the search for some replacement pairs but haven't had a whole lot of luck.  Especially not in the price range I am willing to pay.

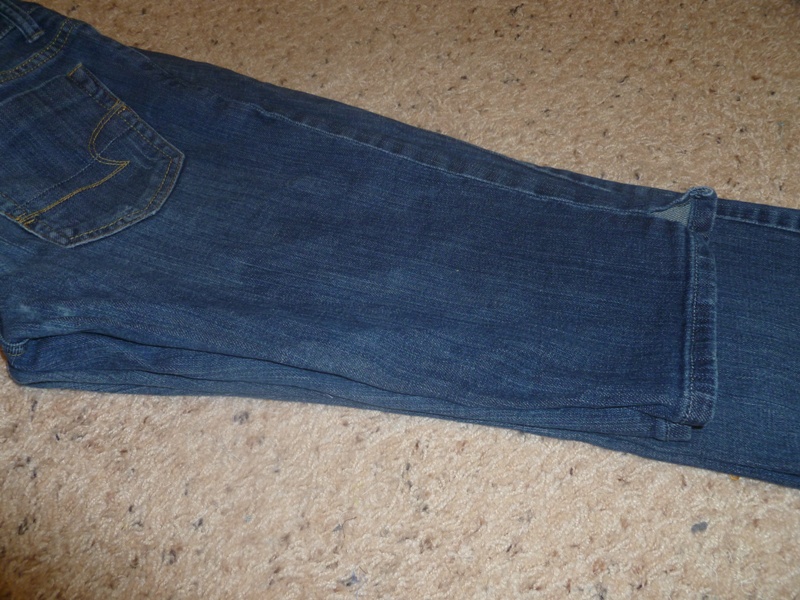
While folding laundry I noticed something not so stylist about a pair of my jeans. 
Oops!  Little embarrassing, but whatever.  I thought about trying to hem them, but had a better idea.
I took a pair of jean shorts that I love and used them as a guide for the length.
Cut through both legs allowing for enough extra material to make your hem.
I knew that I wanted to have a side slit on the outside of my shorts, so I ripped up the side seams.  Make sure that you have the slits even on both sides.
I made sure that I changed out my typical needle for a jean needle.  Sew a seam along your slits, making sure to go slow.  Mine looks a little drunk but you get the idea.  I also serged the bottom edge to prevent fraying.
Fold you hem under, sew a top seam, and you're done.  Quick and easy!


Friday, July 15, 2011

Winner!

Congrats Katie!  I will talk to you about what your preferences are so I can get it started.

Thanks to everyone who entered.  If anyone knows how to get the generator on the blog without taking a picture of it, let me know!


Wednesday, July 13, 2011

Just A Little Too Late

All morning I have been singing the song "It's just a little to late, a little too wrong and I can't wait.  You know all the right things to say.  Oh, it's just a little too late."  And this is why...

My sister called me this morning to see if I had seen this post on Make It and Love It.  Gasp!  It was like she read my mind, but just posted it before me!!  I had also run across this tutorial and thought it was a great idea.  I headed to HL and found their flip flops for 50% off, which only made them $0.99!  They don't have a ton of colors but for a buck it was worth trying out.  I tried several times to recreate what Mother Huddle did but without much success.  I just wasn't liking the look.  So I started braiding my knit fabric.  My issue came when I couldn't figure out how attach it to the back side holes.  That is why I am glad Ashley posted her version. 
The first thing I changed was I braided the sides also.  My sister came up with this idea.  Genius!  The second thing I changed was I did not tie up the front part.  I didn't really like that look and the braids do not bother me between my toes.
I have worn them all day and I LOVE them.  Totally comfortable.  Enjoy!